Connect your Cyber Score account to GoHighLevel to automatically enrich your contacts with Cyber Score sales intelligence
Feb 9, 2026
You will need
Active Iceberg Cyber account
GoHighLevel account with admin access
Permission to connect third-party apps to GoHighLevel
The Team owner if you are using Iceberg Cyber with your team
Understanding the GoHighLevel Integration
When you connect Cyber Score to GoHighLevel, your contacts are automatically enriched with cyber sales intelligence. Every time you add or update a contact in GoHighLevel, we will add valuable cyber sales intelligence to the contact record.
IMPORTANT: For Team Owners and Agencies
If you are running an agency with multiple sub-accounts, it's important that the Team Owner of each sub-account connects the GoHighLevel account with Iceberg Cyber. Each sub-account will need to connect the integration separately and the Team Owner should be the one to initiate the connection to ensure Team credits are used to process Cyber Score requests.
If you are using Iceberg Cyber as a team (not as part of an agency), the Team Owner should follow these instructions so that credits are consumed from the Team account.
How to Connect Cyber Score to GoHighLevel
1. Log in to your Iceberg Cyber account
Note: If you are using Iceberg Cyber as a team, the Team Owner should follow these instructions so that credits are consumed from the Team account. If you are an agency, each of your sub-accounts will need to follow this process.
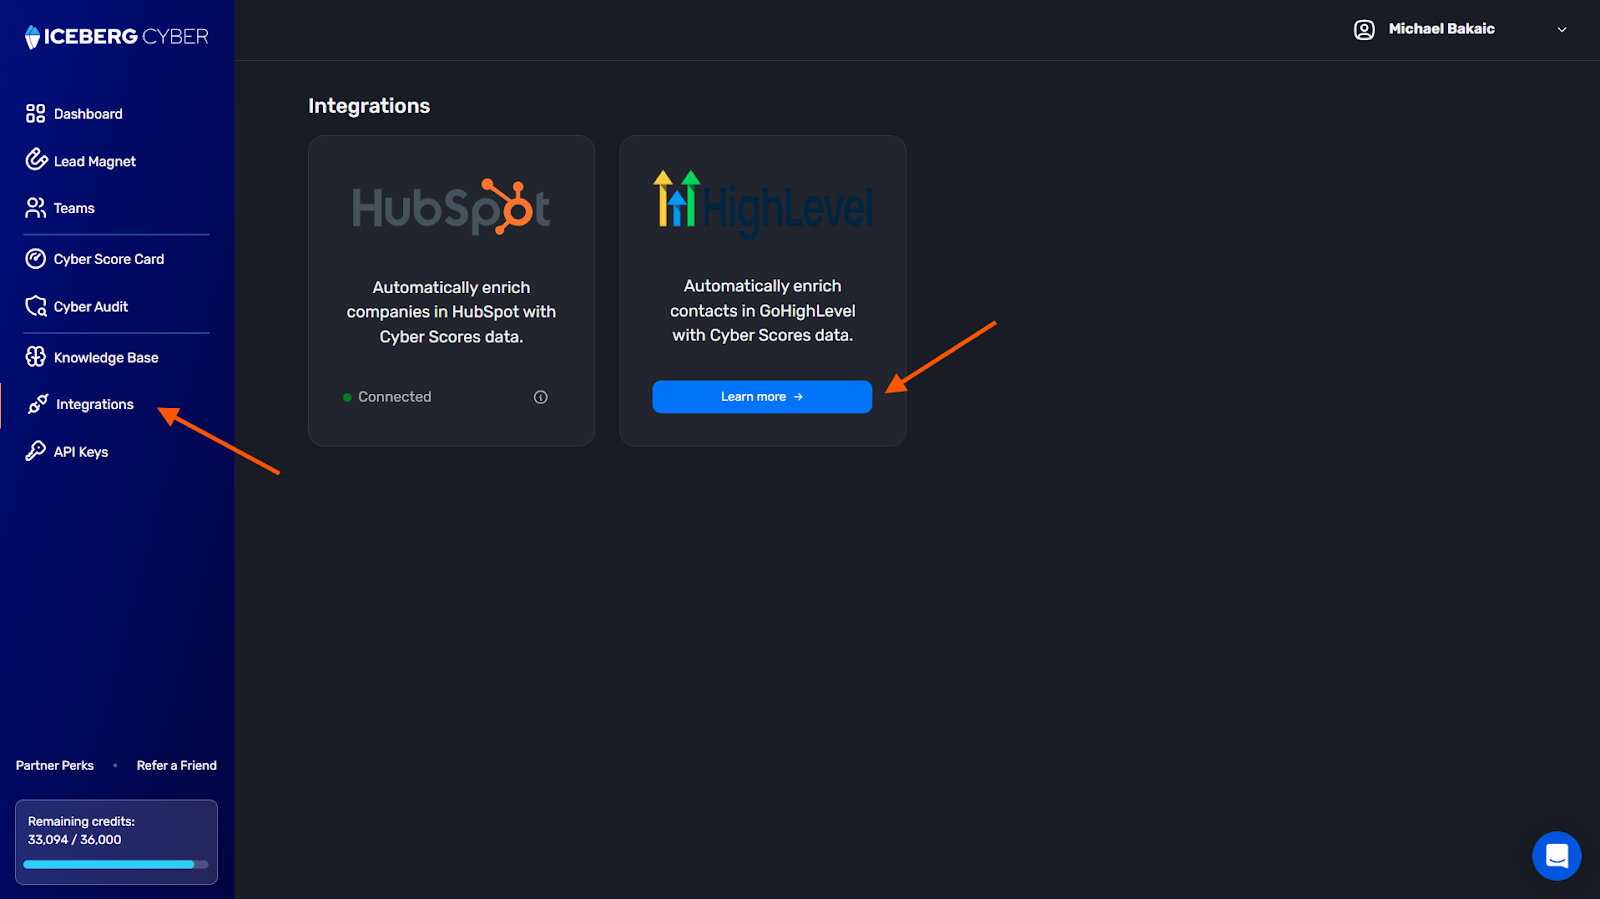
3. On the GoHighLevel integration click Learn more
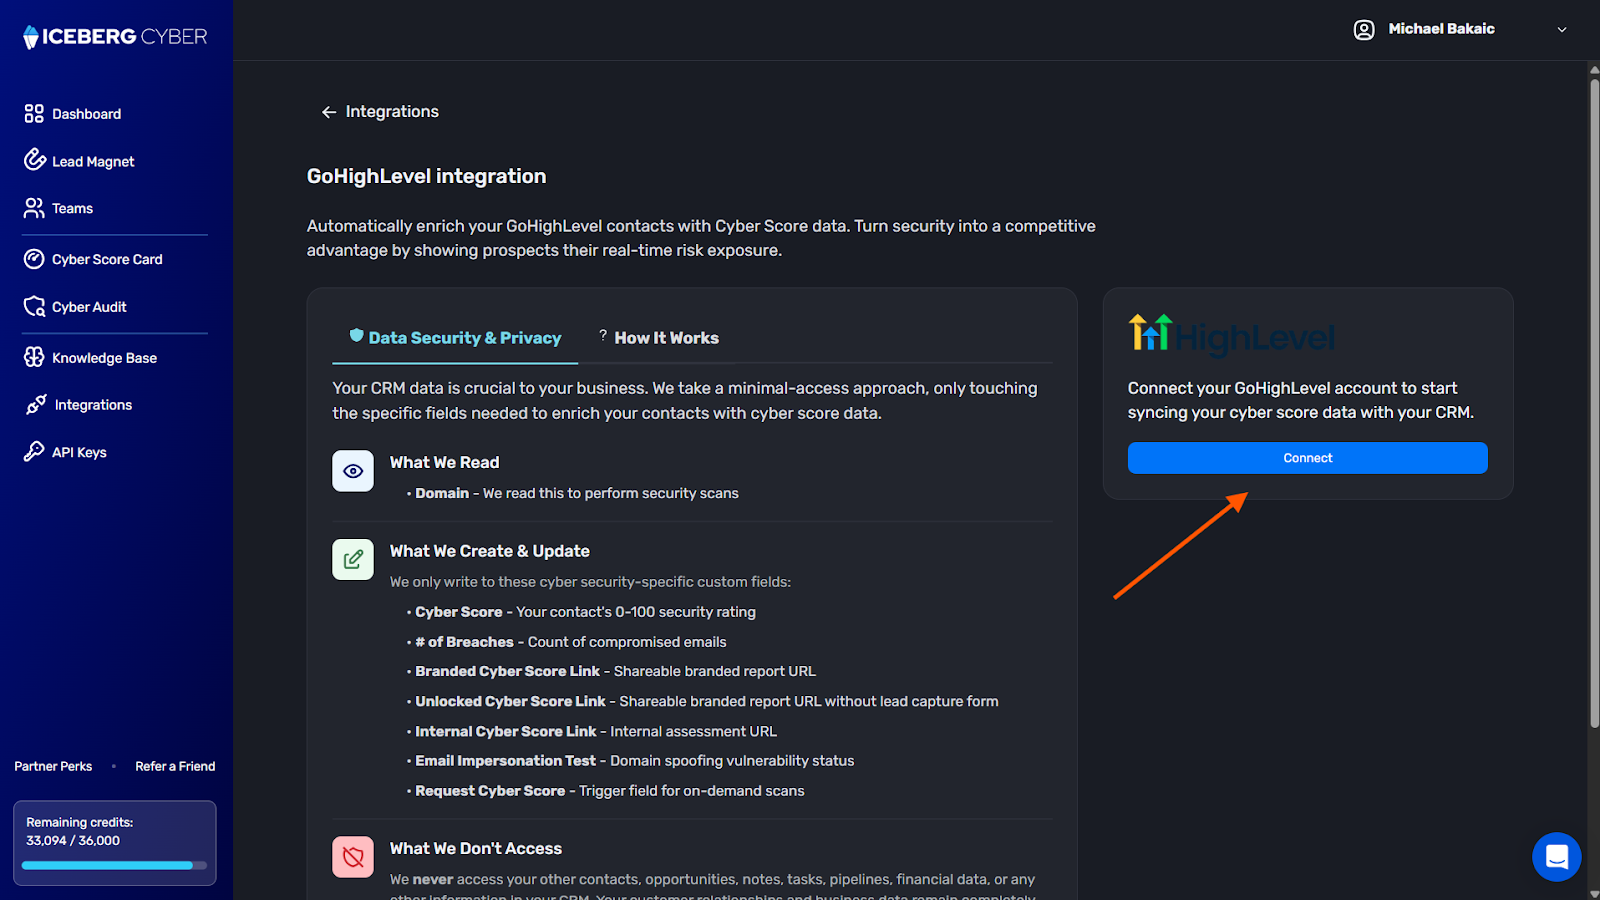
4. Review the integration details and click Connect to begin the connection process
5. You will be redirected to the GoHighLevel login page
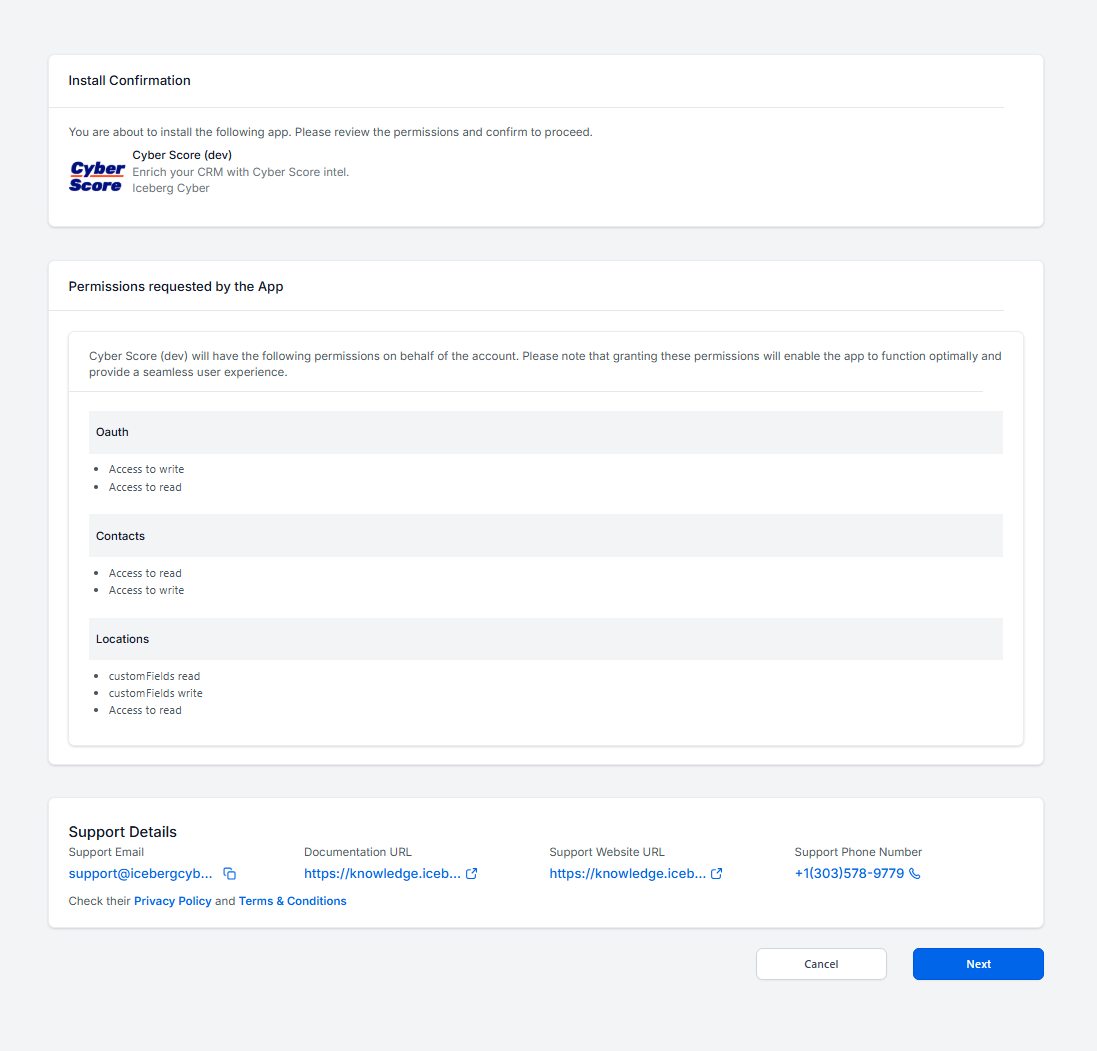
6. Review the access permissions requested by Cyber Score
7. Scroll down to the bottom of the page and click Next
8. The integration is now connected
Expected Result
Your Cyber Score account is now connected to GoHighLevel. You can now proceed to configure automation workflows to automatically request Cyber Scores for your contacts.
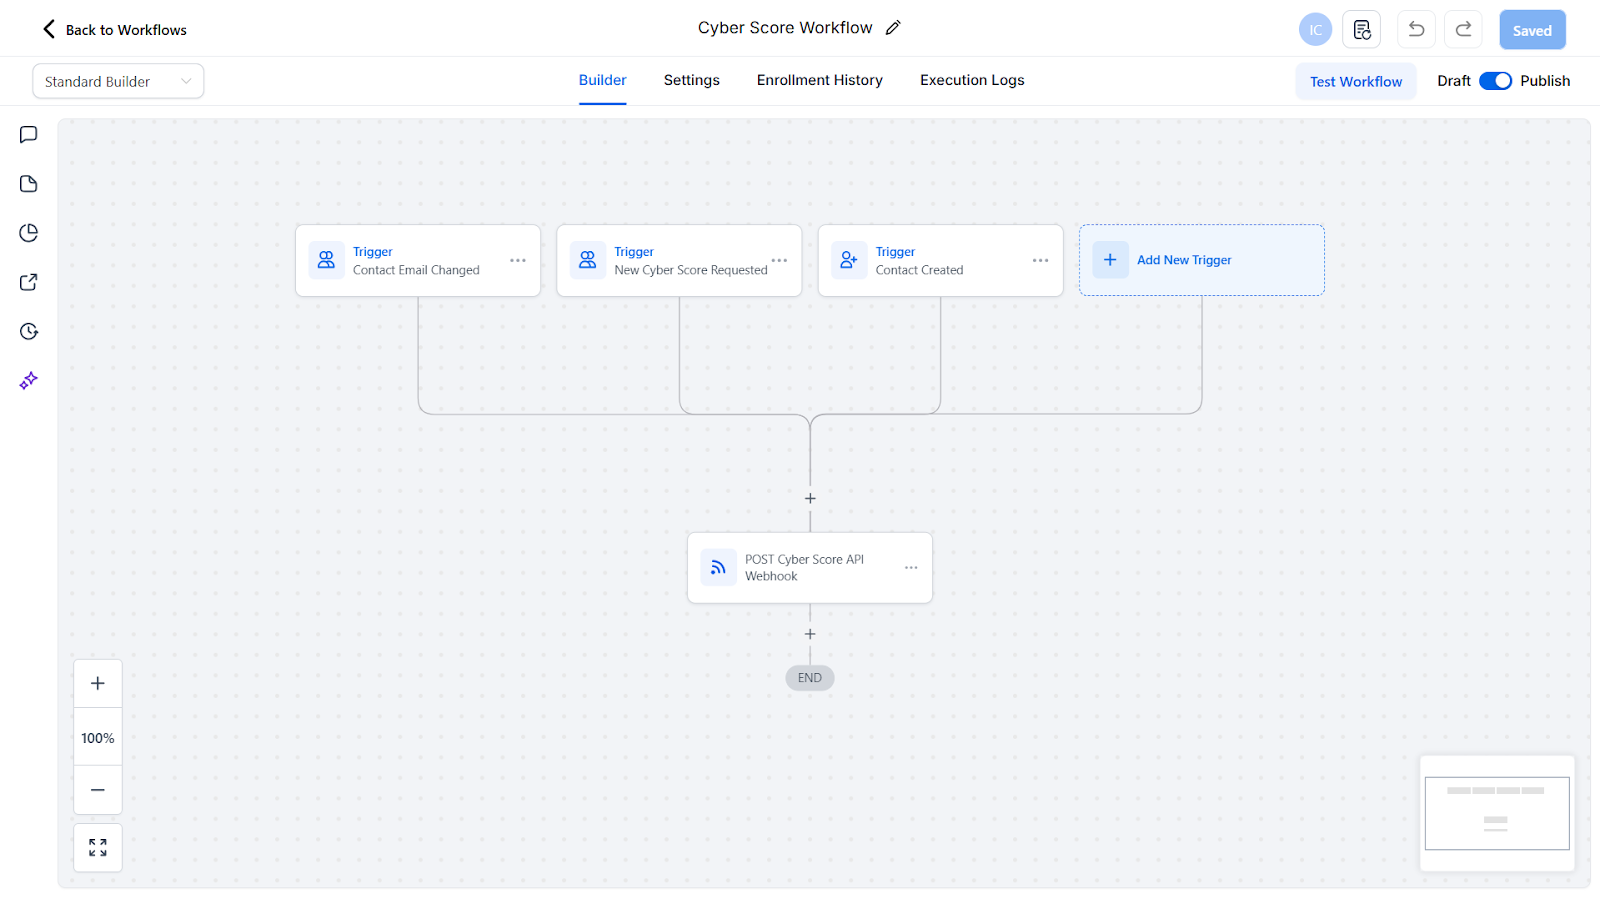
Setting Up Automation Workflows
To use the integration effectively, you need to create an automation workflow that triggers Cyber Score requests when specific events occur. This workflow will automatically enrich your contacts with Cyber Score data.
Automation Workflow Configuration
The automation workflow should include the following components:
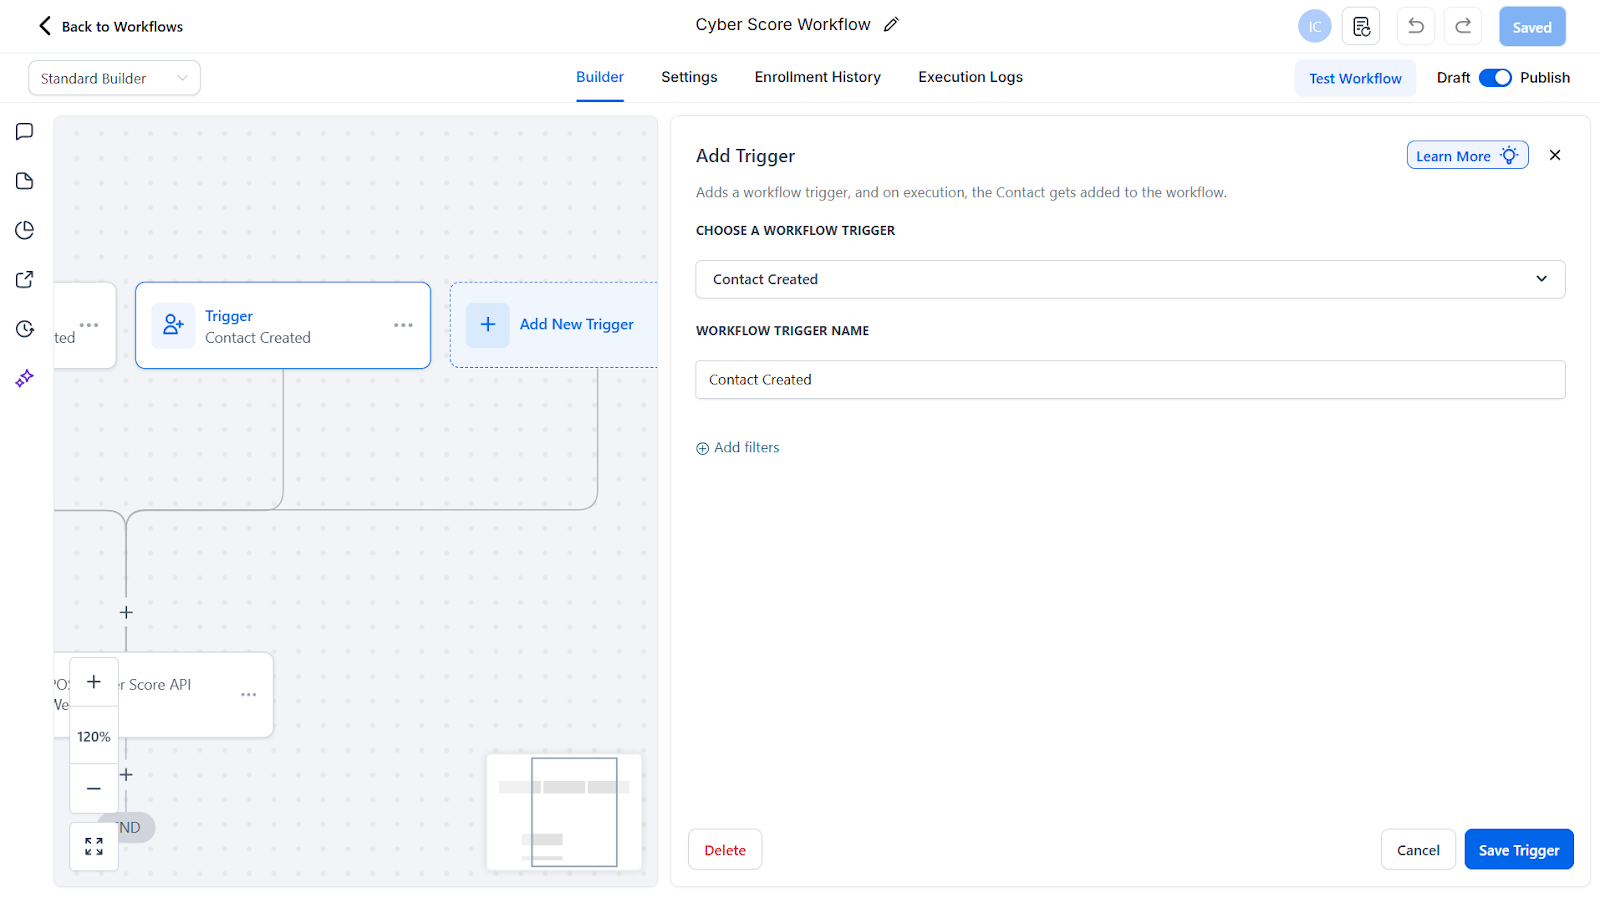
This trigger activates when a new contact is added to GoHighLevel
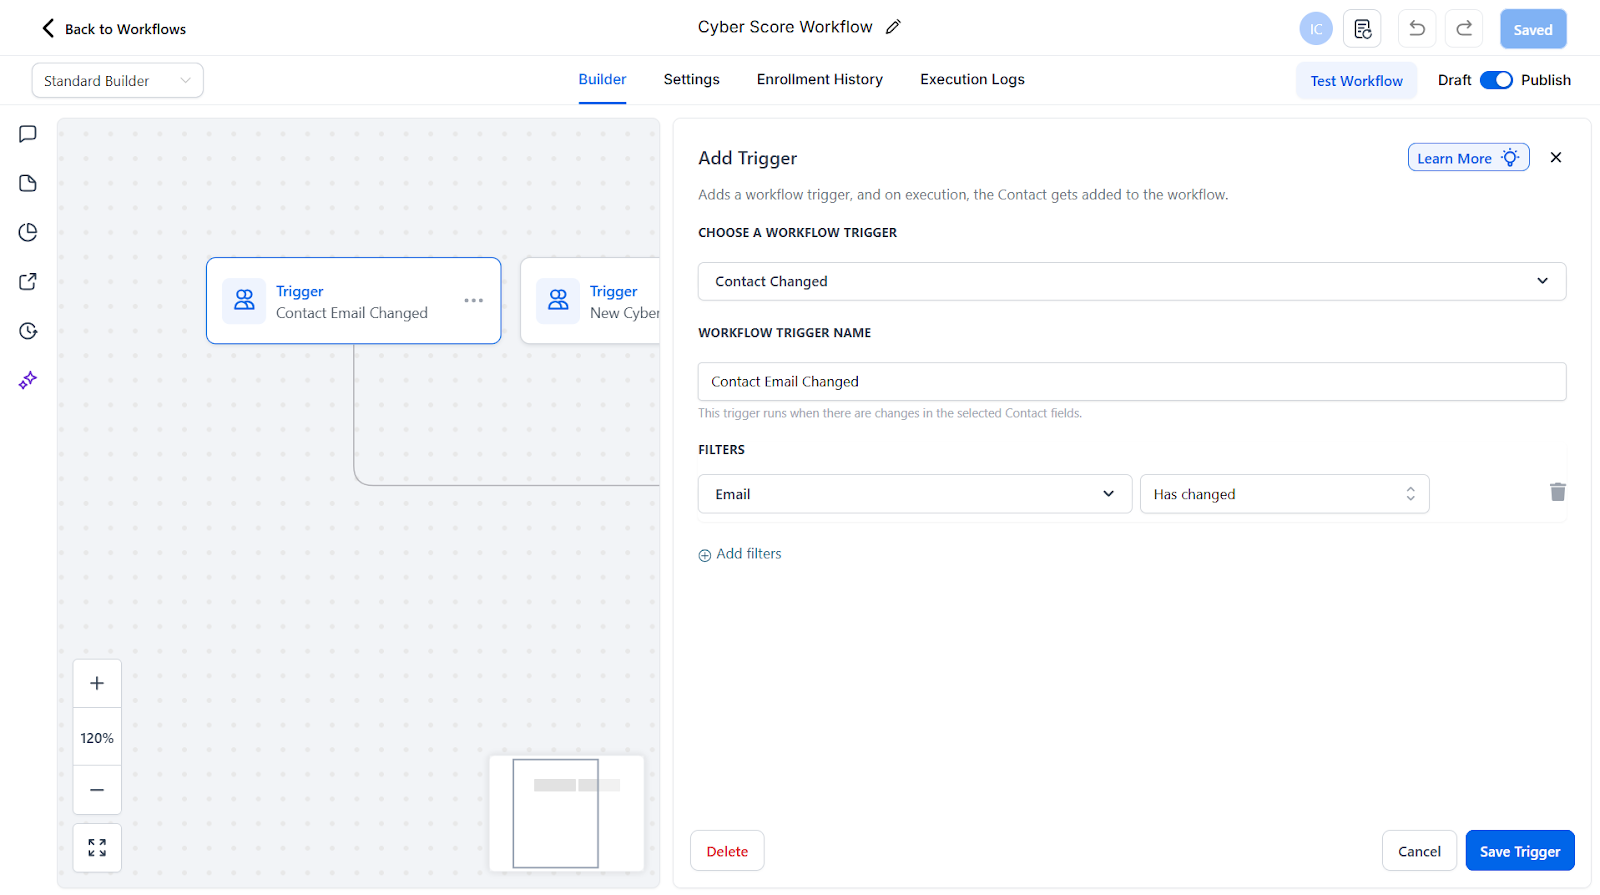
2. Contact Email Changed
This trigger activates when a contact's email address is updated
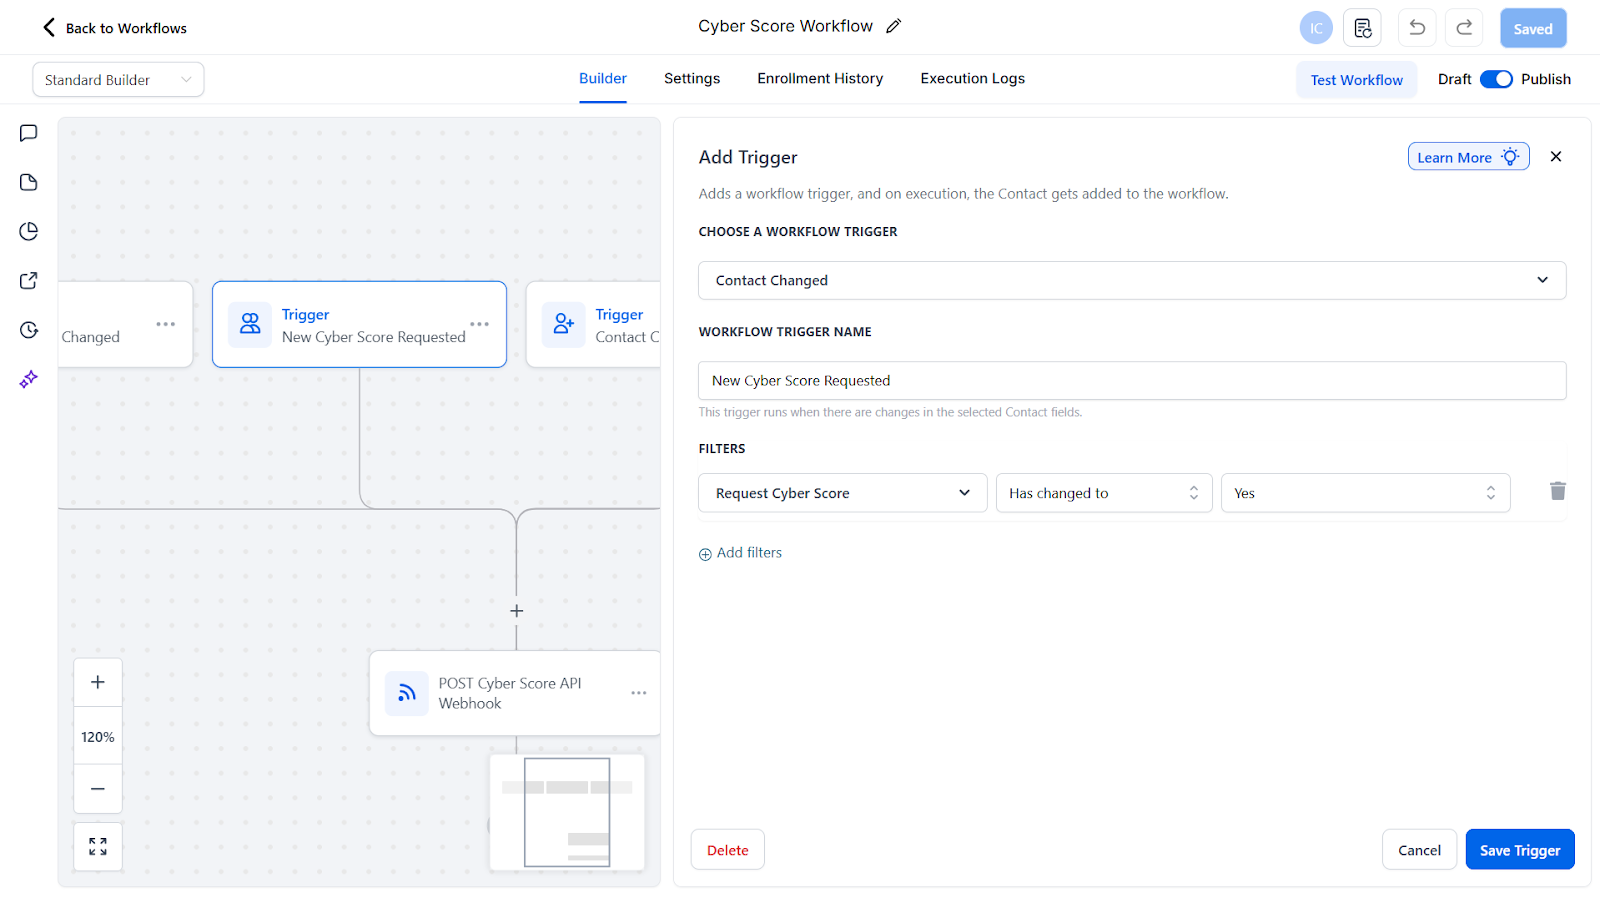
3. New Cyber Score Requested
This trigger activates when a Cyber Score is requested for a contact
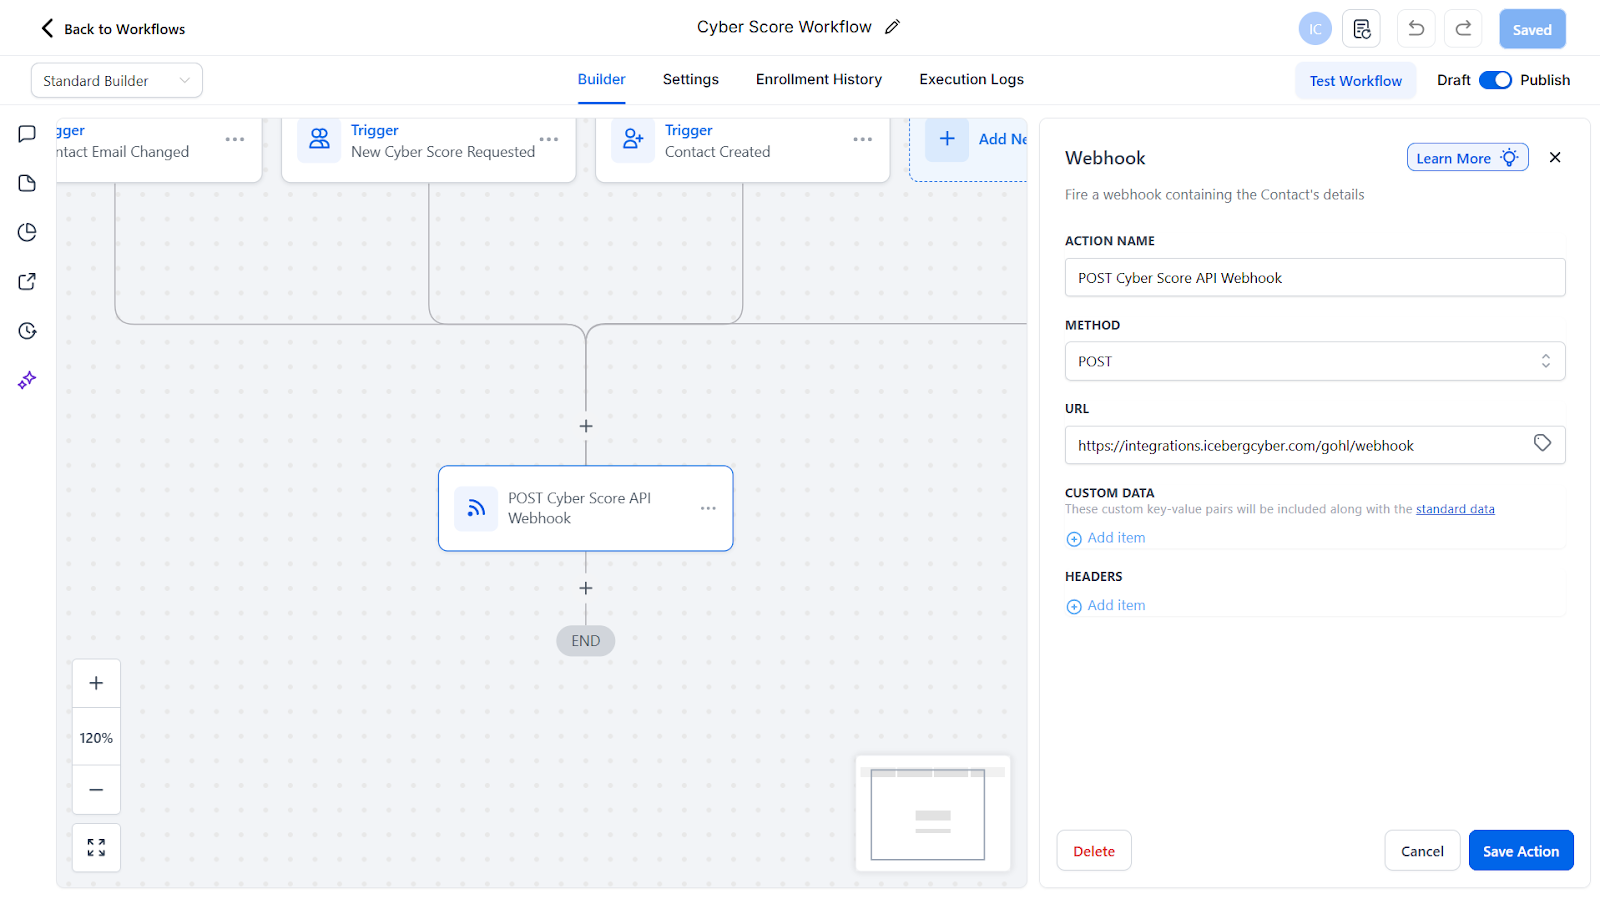
Workflow Webhook
The last step in the workflow should be a webhook that sends the request to Iceberg Cyber.
Method: POST URL: https://integrations.icebergcyber.com/gohl/webhook
Expected Result
When the workflow is properly configured and published, any of the three trigger events will automatically send a request to Cyber Score to enrich the contact with cyber sales intelligence.
How to Create a Custom Folder for Cyber Score Fields
Note: You should do this after the app has been installed on the sub-account and the custom fields have been created in GoHighLevel.
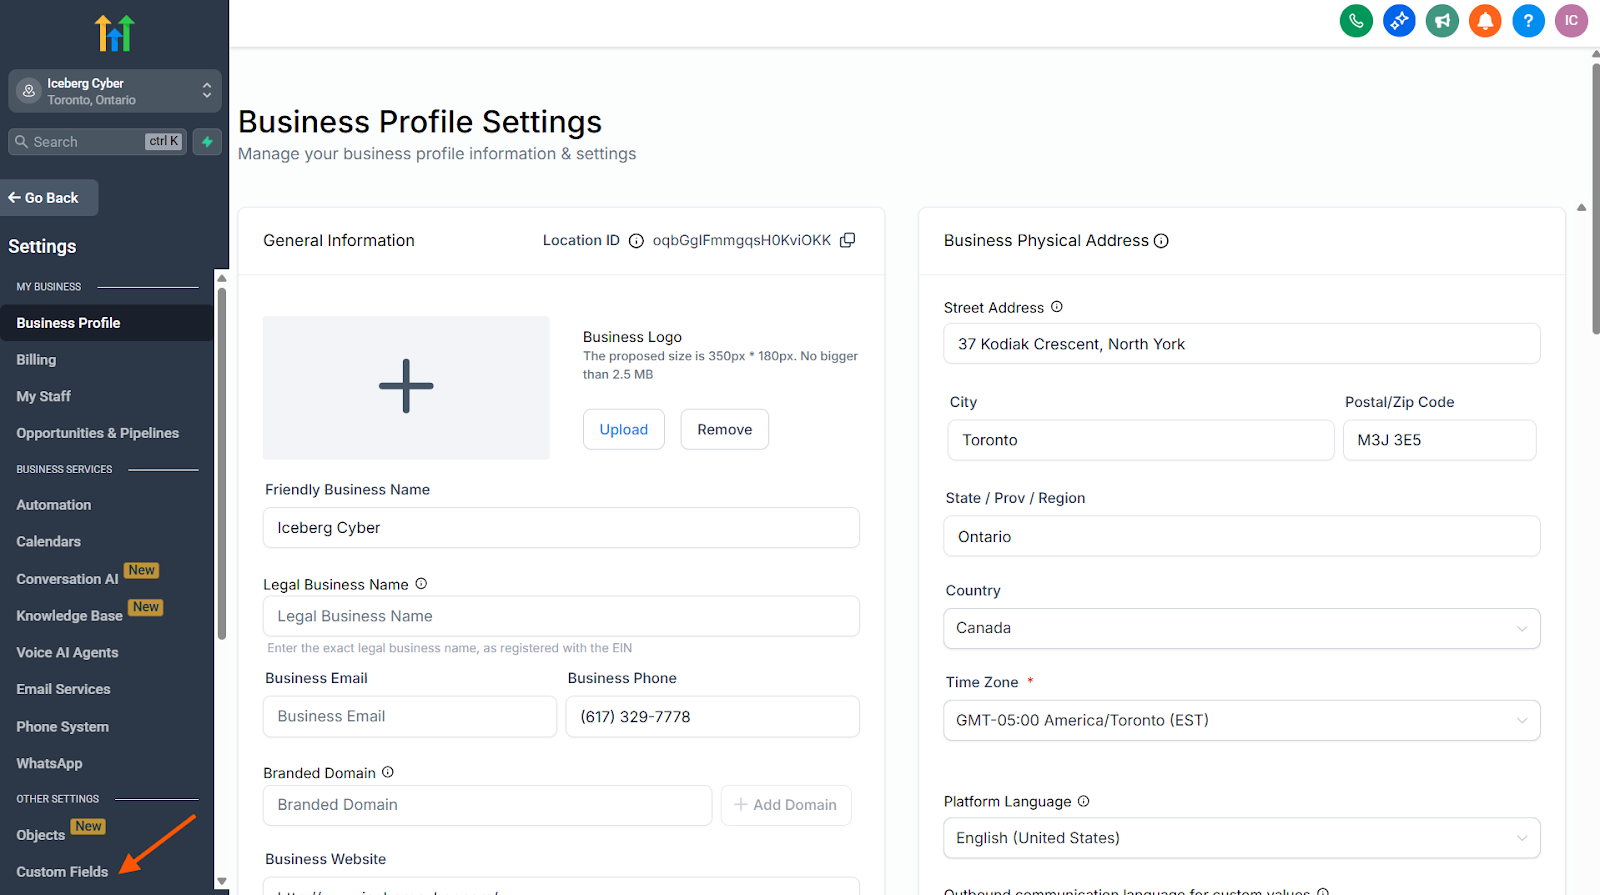
1. In a Sub-Account view, click on Settings
2. Click on Custom Fields from the side menu
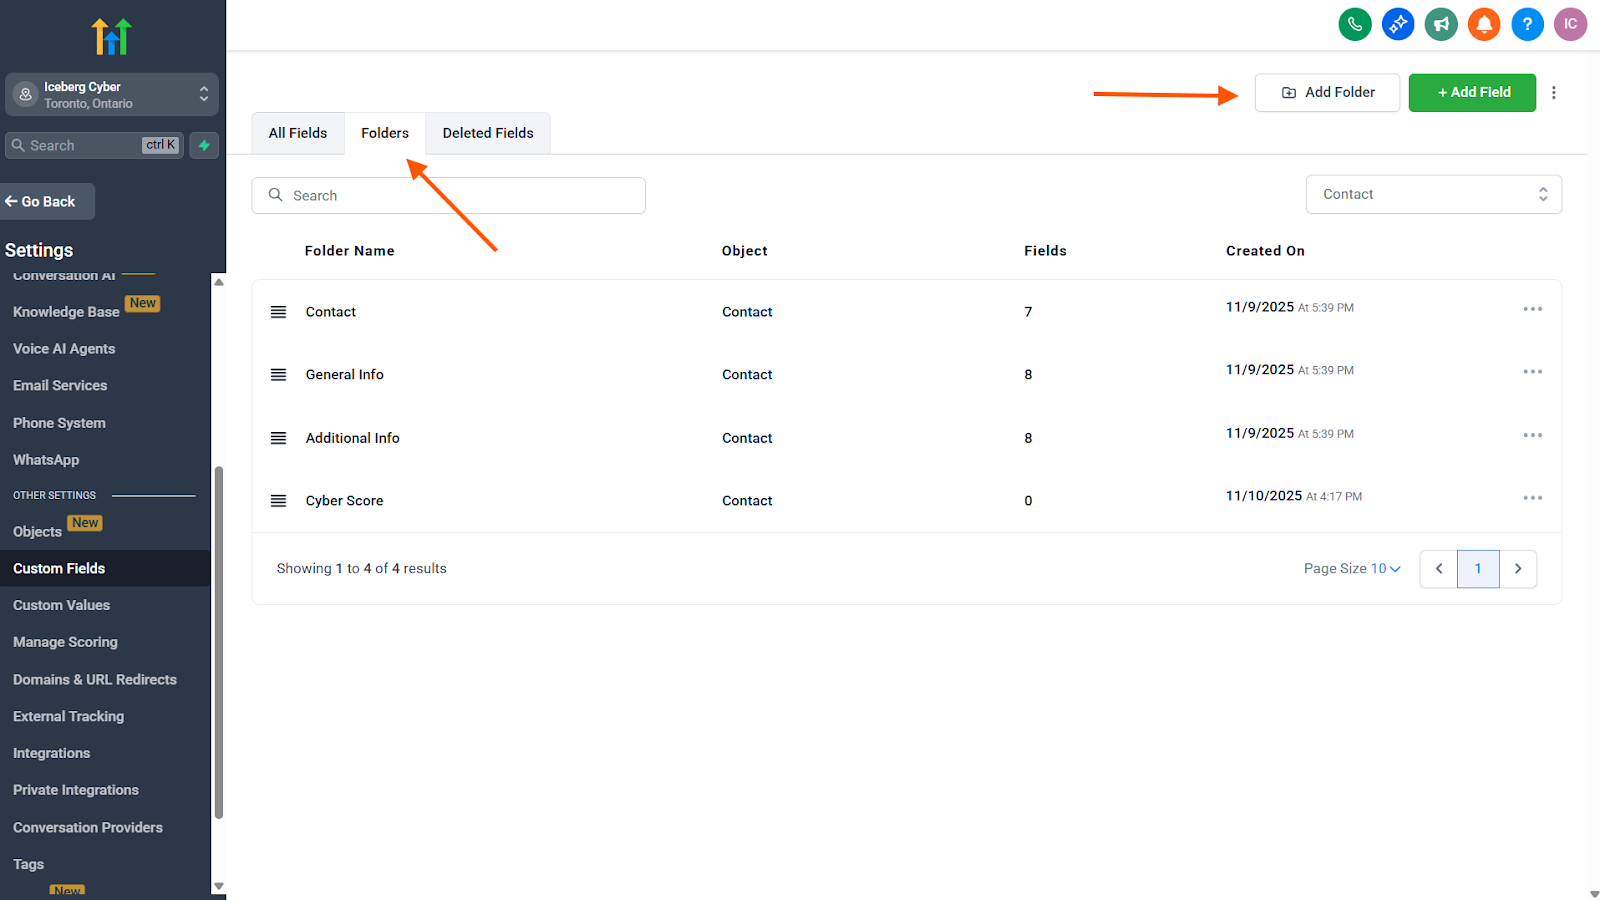
3. Click on the Folders tab
4. Click Add Folder
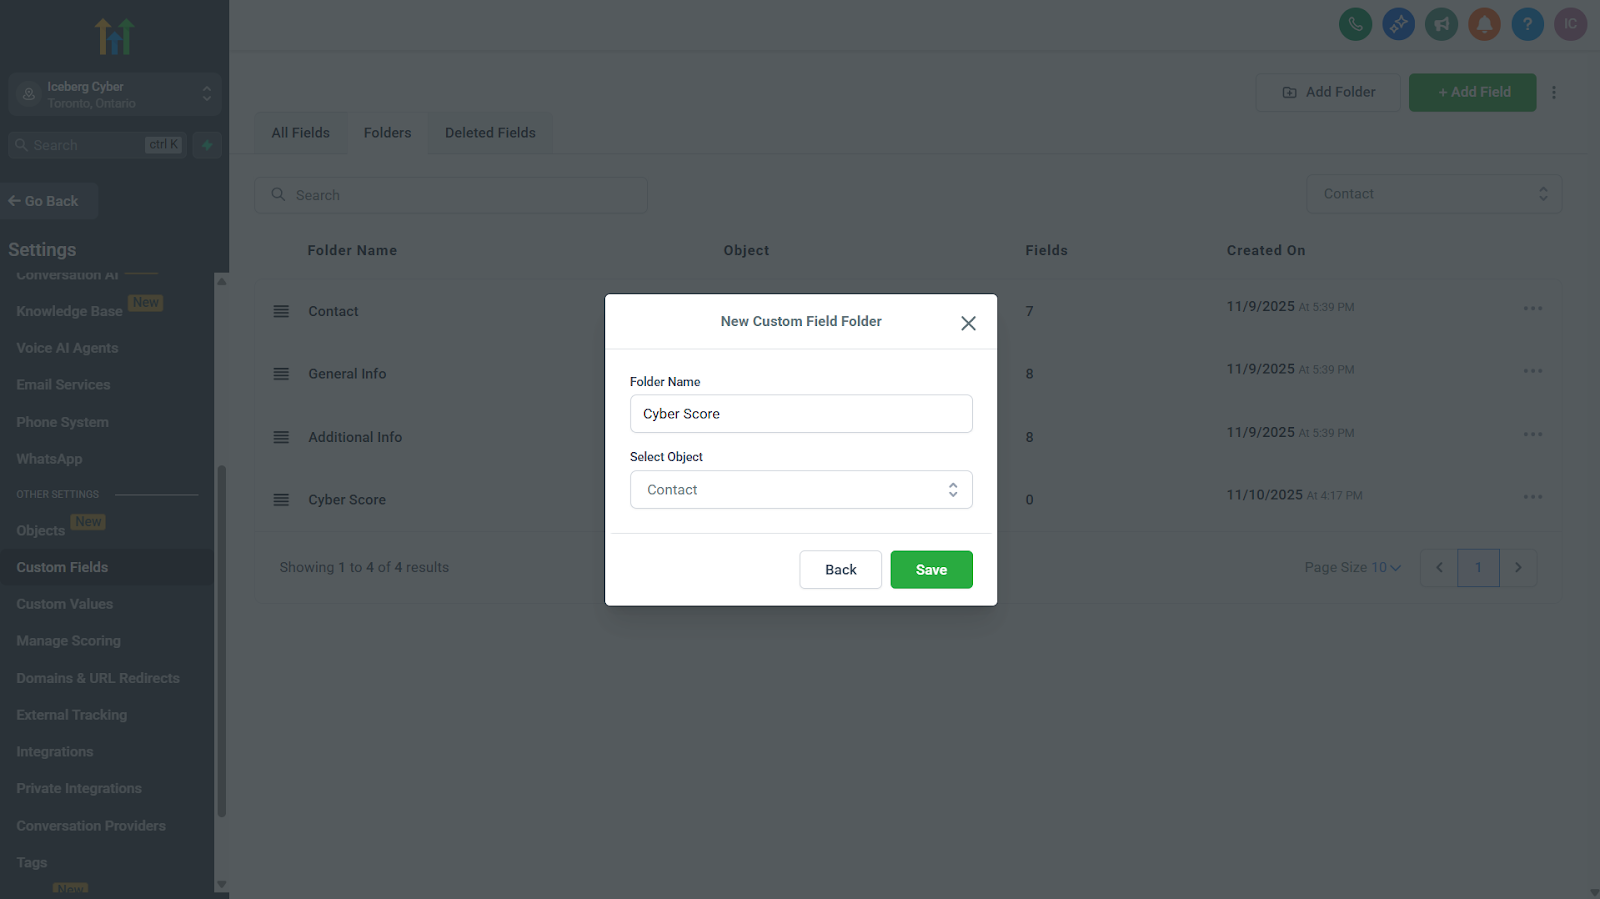
5. Enter Cyber Score (or your preferred name) in the Folder Name field
6. Select Contact from the Select Object dropdown
7. Click Save
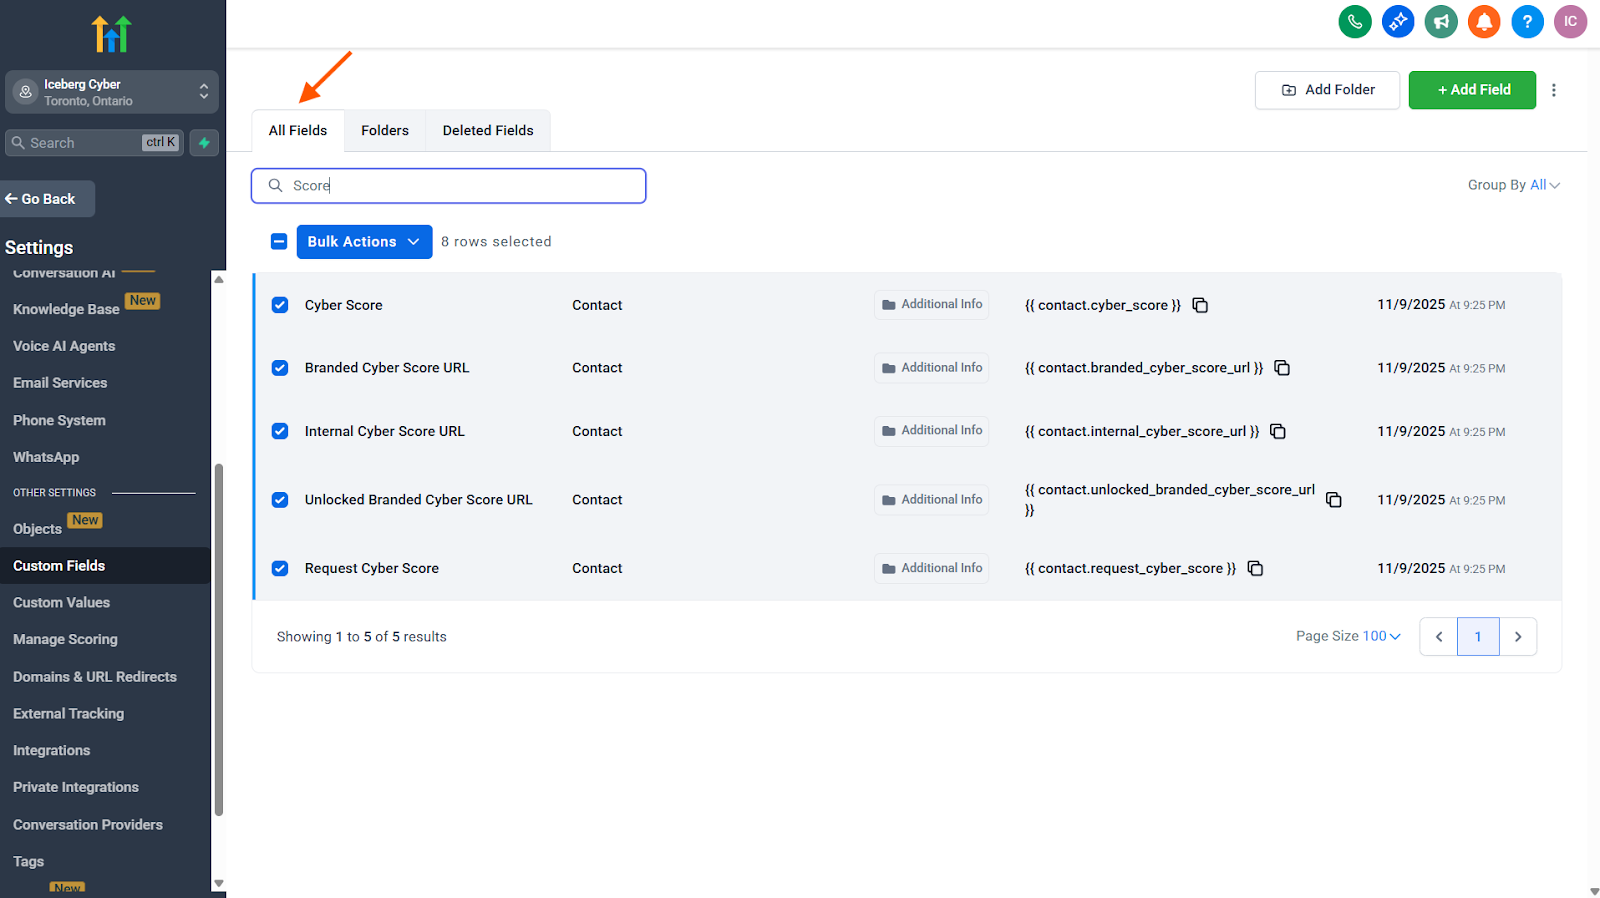
8. Click on the All Fields tab
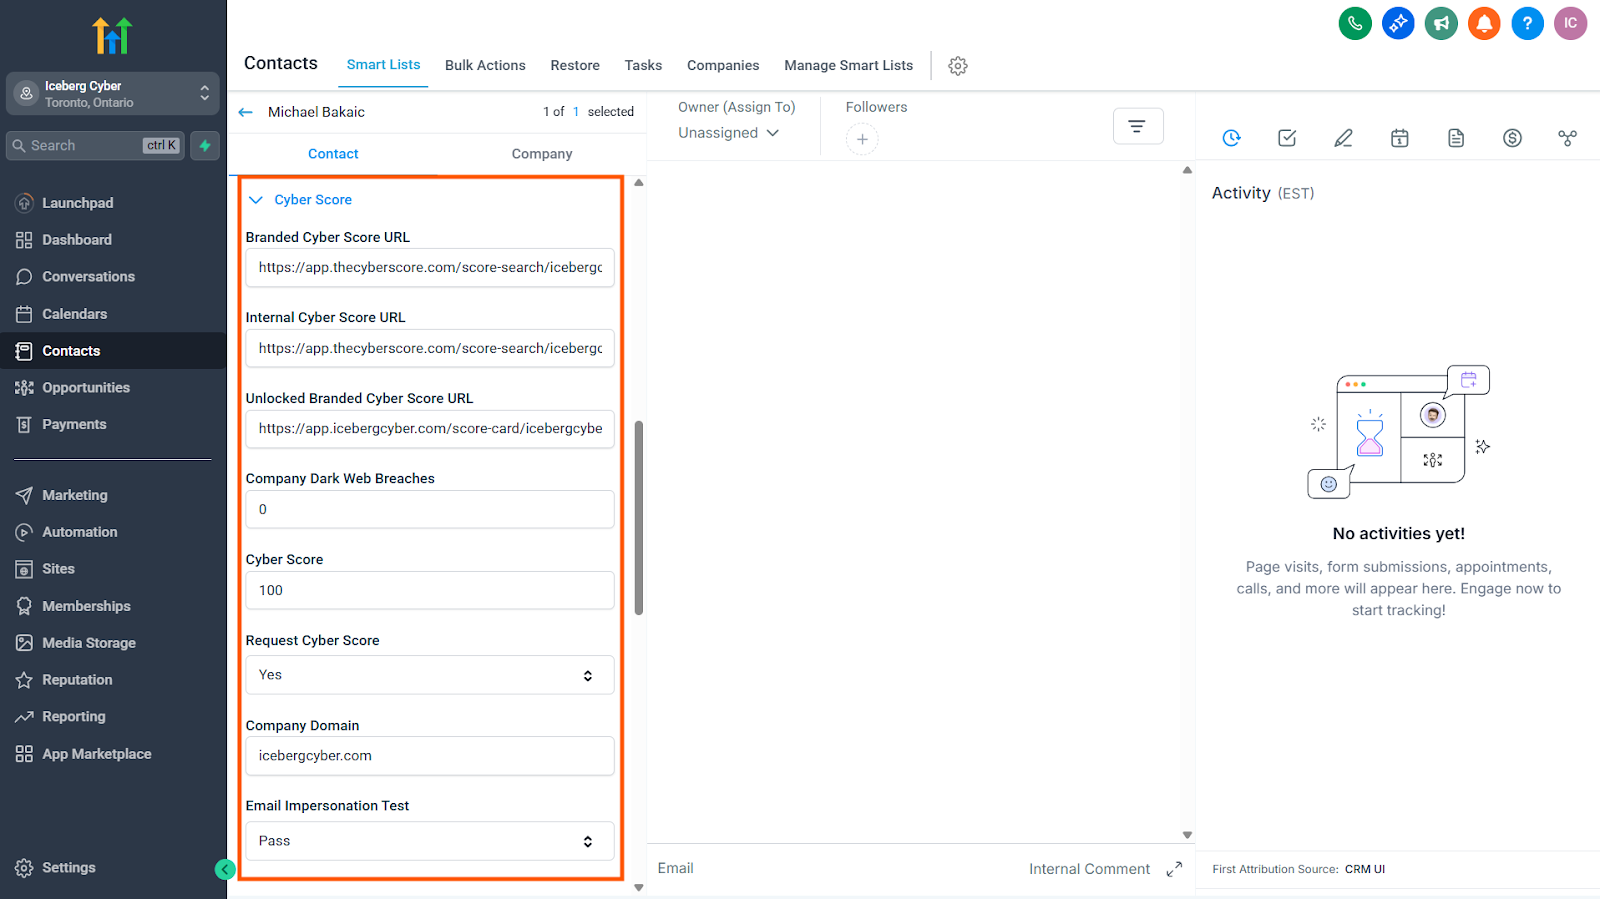
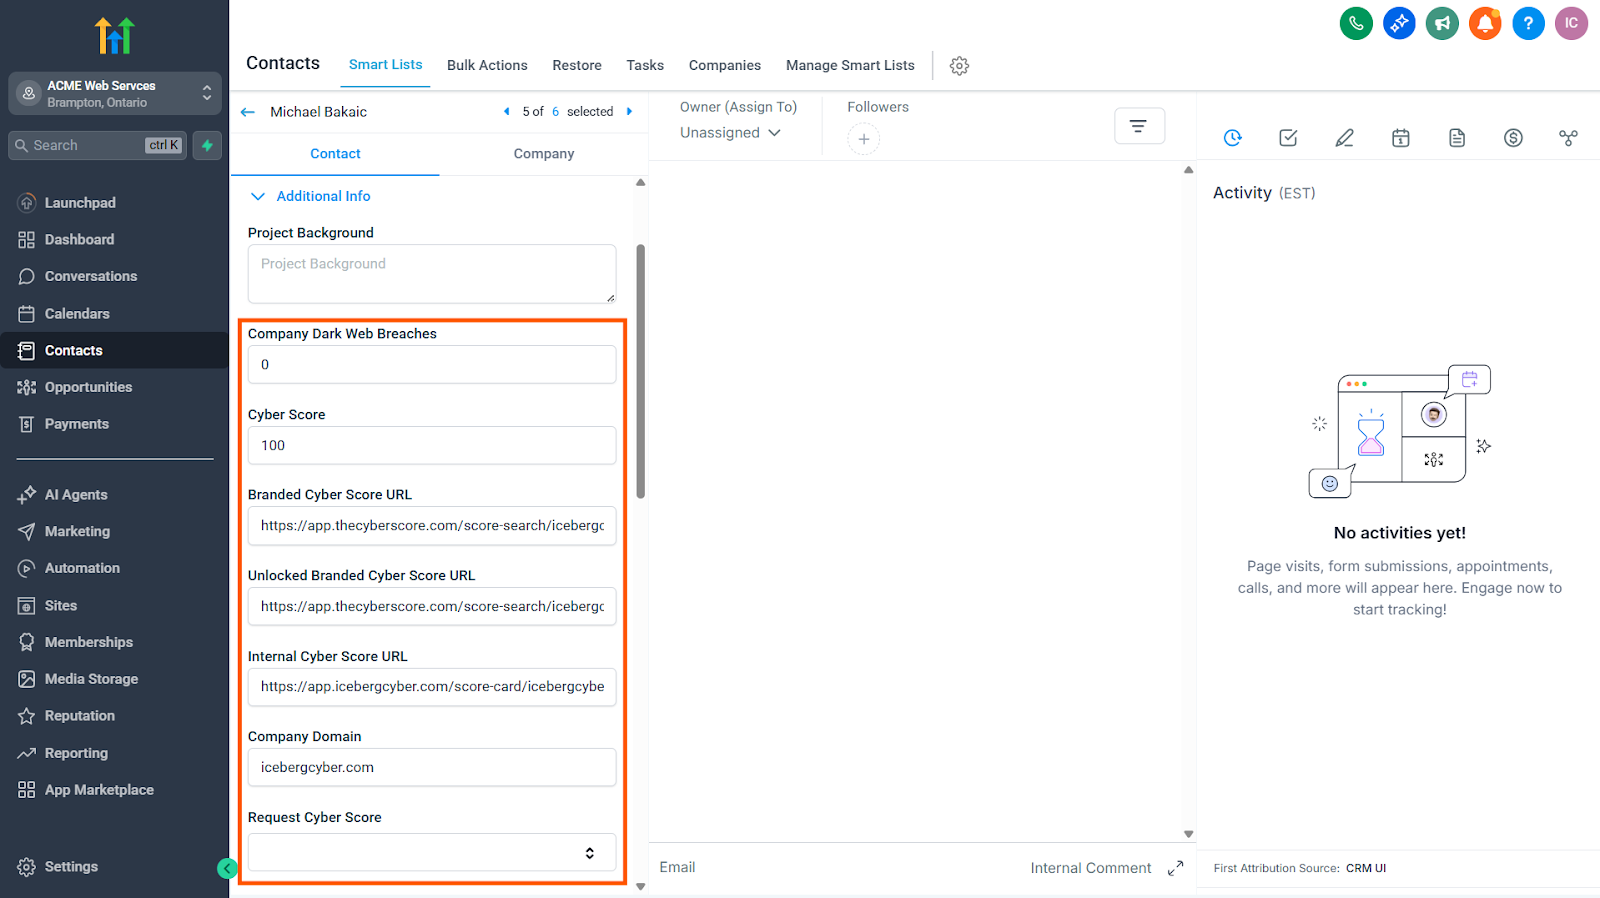
9. Search for and select all 8 of the following fields:
Cyber Score
Company Dark Web Breaches (# of Breaches)
Request Cyber Score
Branded Cyber Score URL
Unlocked Branded Cyber Score URL
Internal Cyber Score URL
Email Impersonation Test
Company Domain
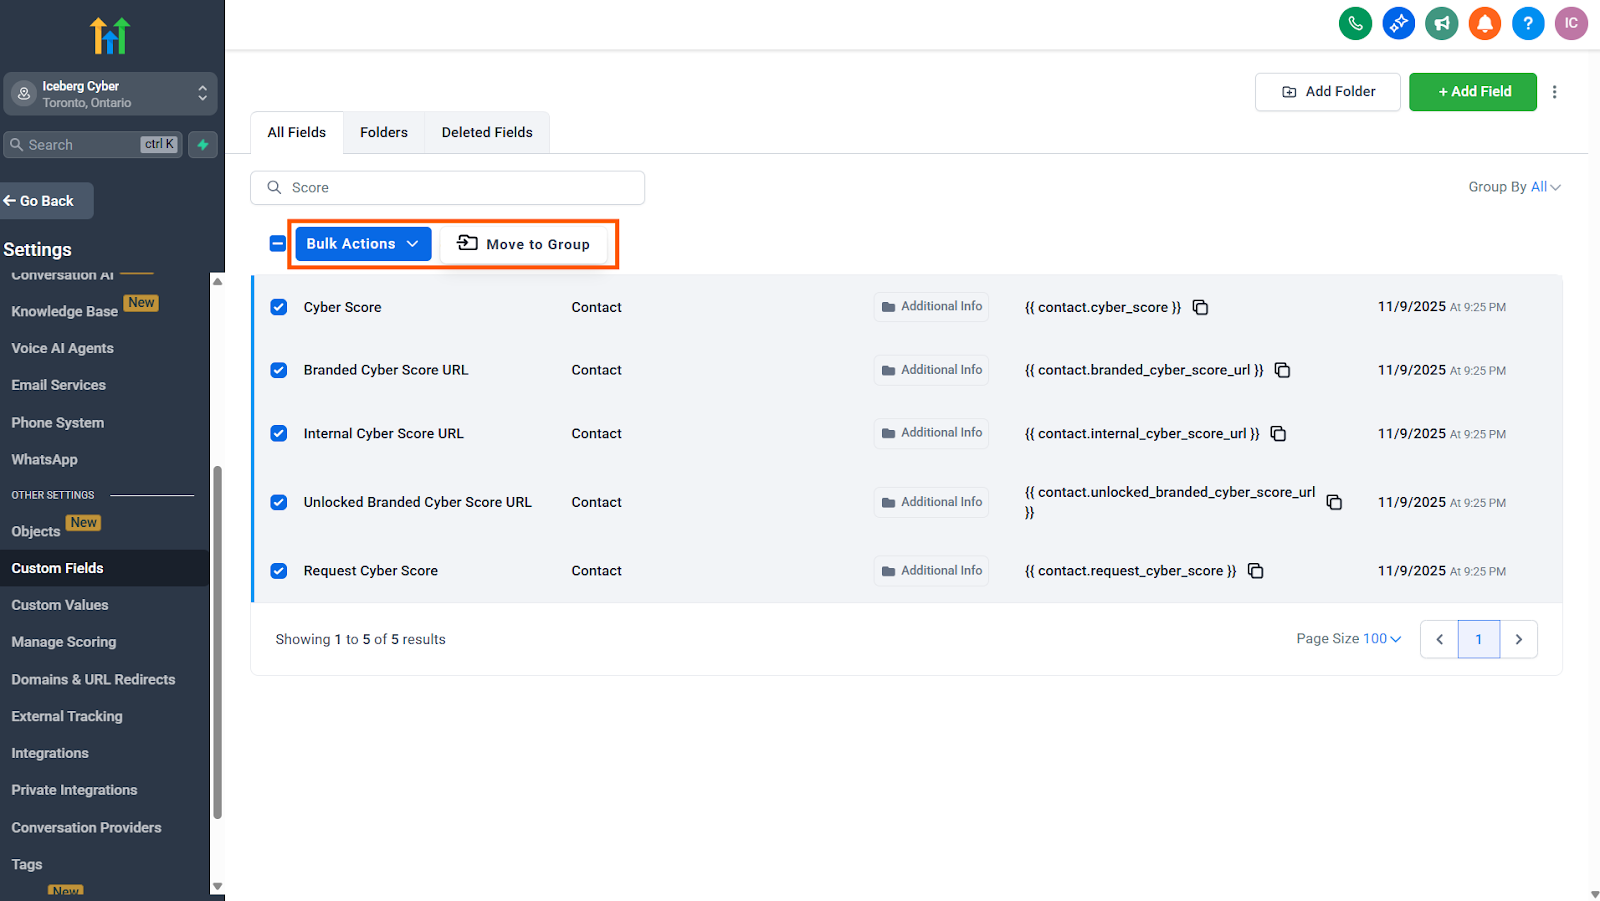
10. Click Bulk Actions
11. Click Move to Group
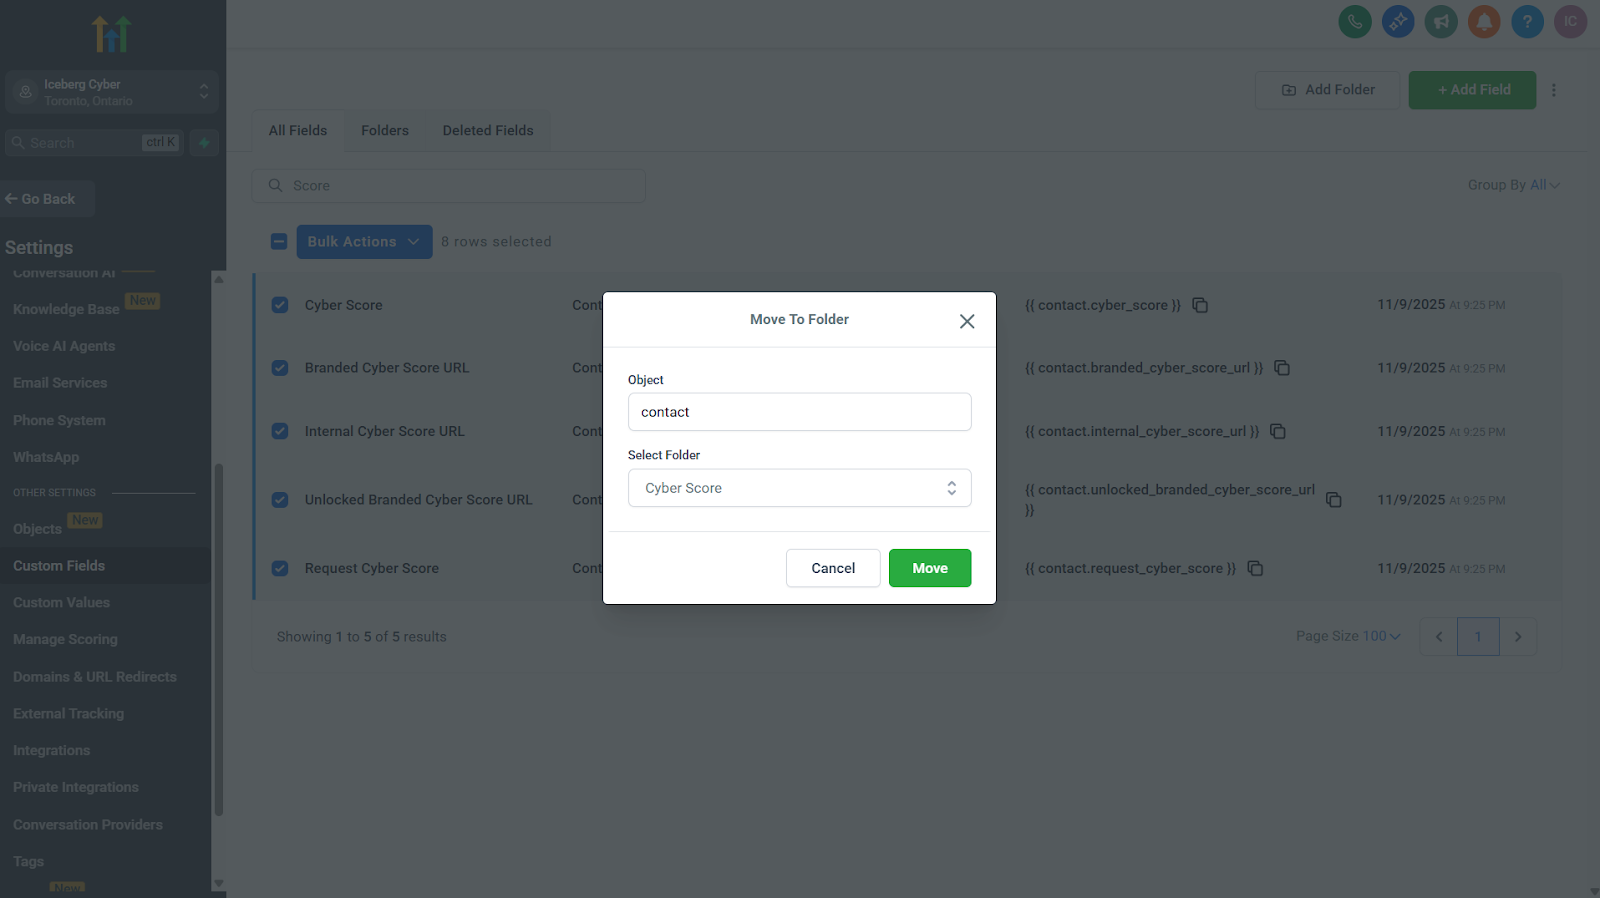
12. Under Select Folder, choose the folder you just created
13. Click Move
Expected Result
All of the Cyber Score sales intelligence is now organized under the Cyber Score folder in your contact record.
Using Snapshots to Share Workflows and Custom Folders
If you're running an agency with multiple sub-accounts, you can create the above automation workflow and custom folder in one account and then use a Snapshot of that account to share it with all your other sub-accounts. This saves time and ensures consistency across all accounts. Follow these steps to deploy the Cyber Score workflow to all your sub-accounts:
Step 1: Create a Snapshot
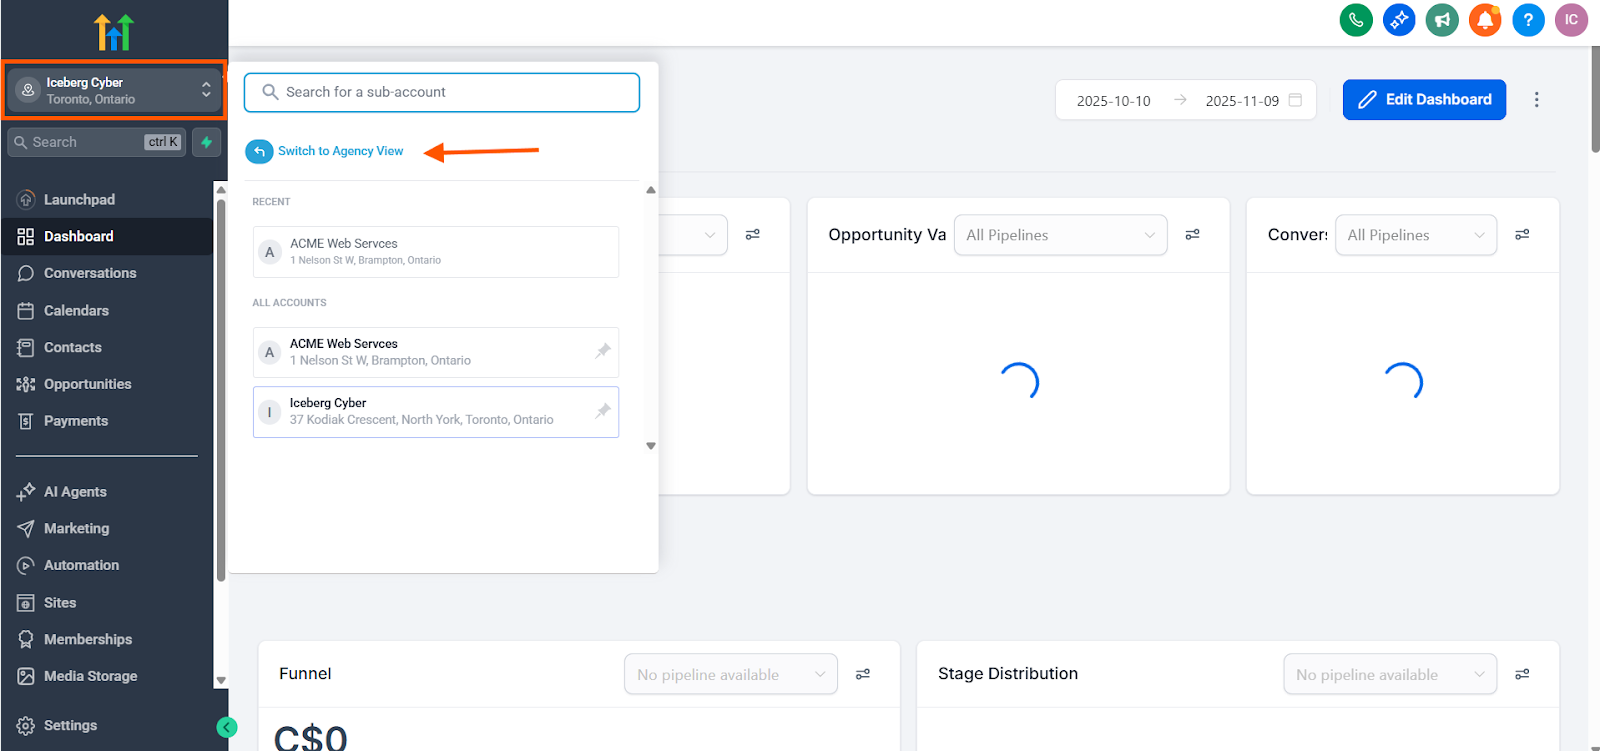
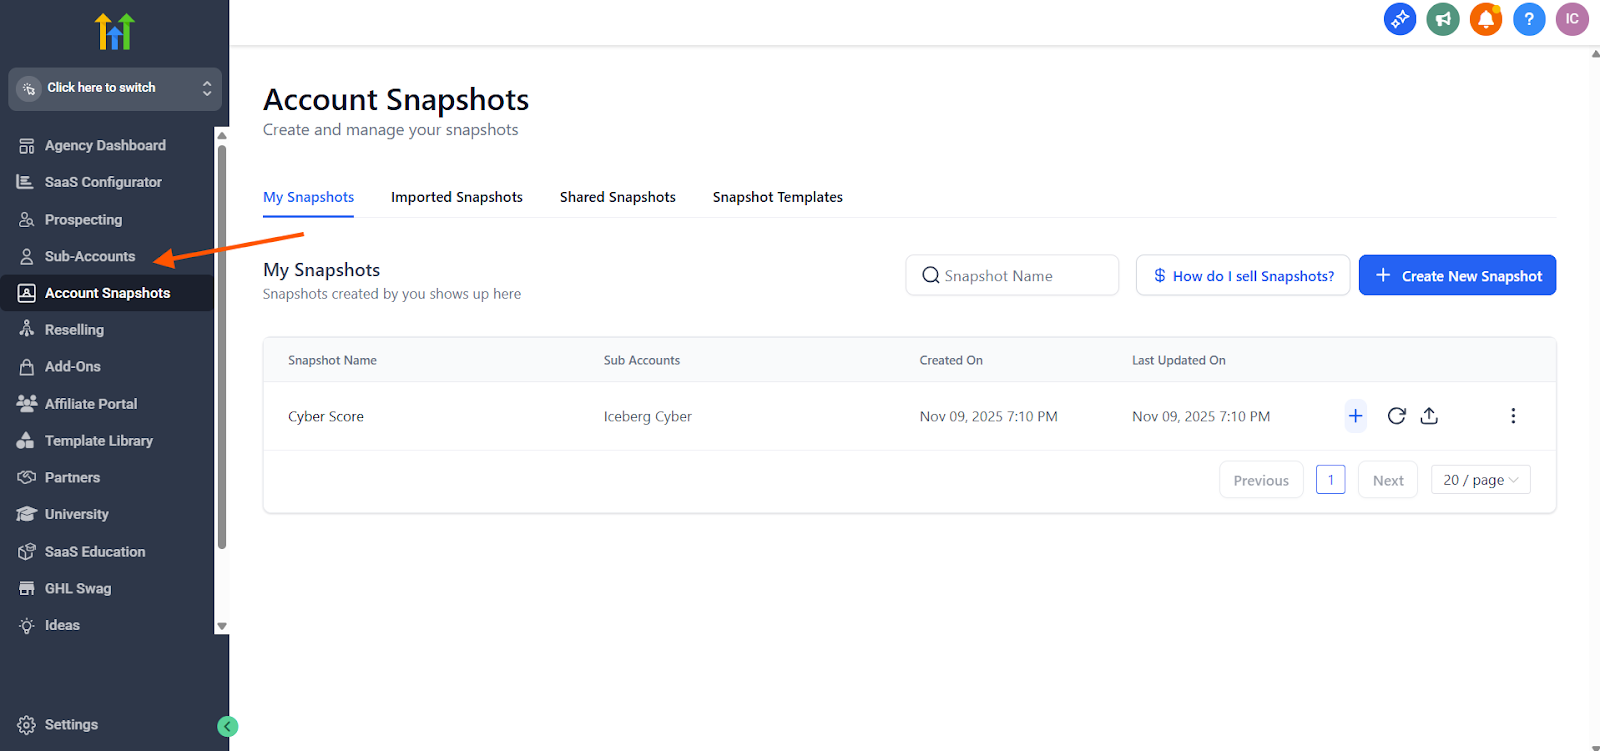
1. Switch to the Agency View from the navigation menu
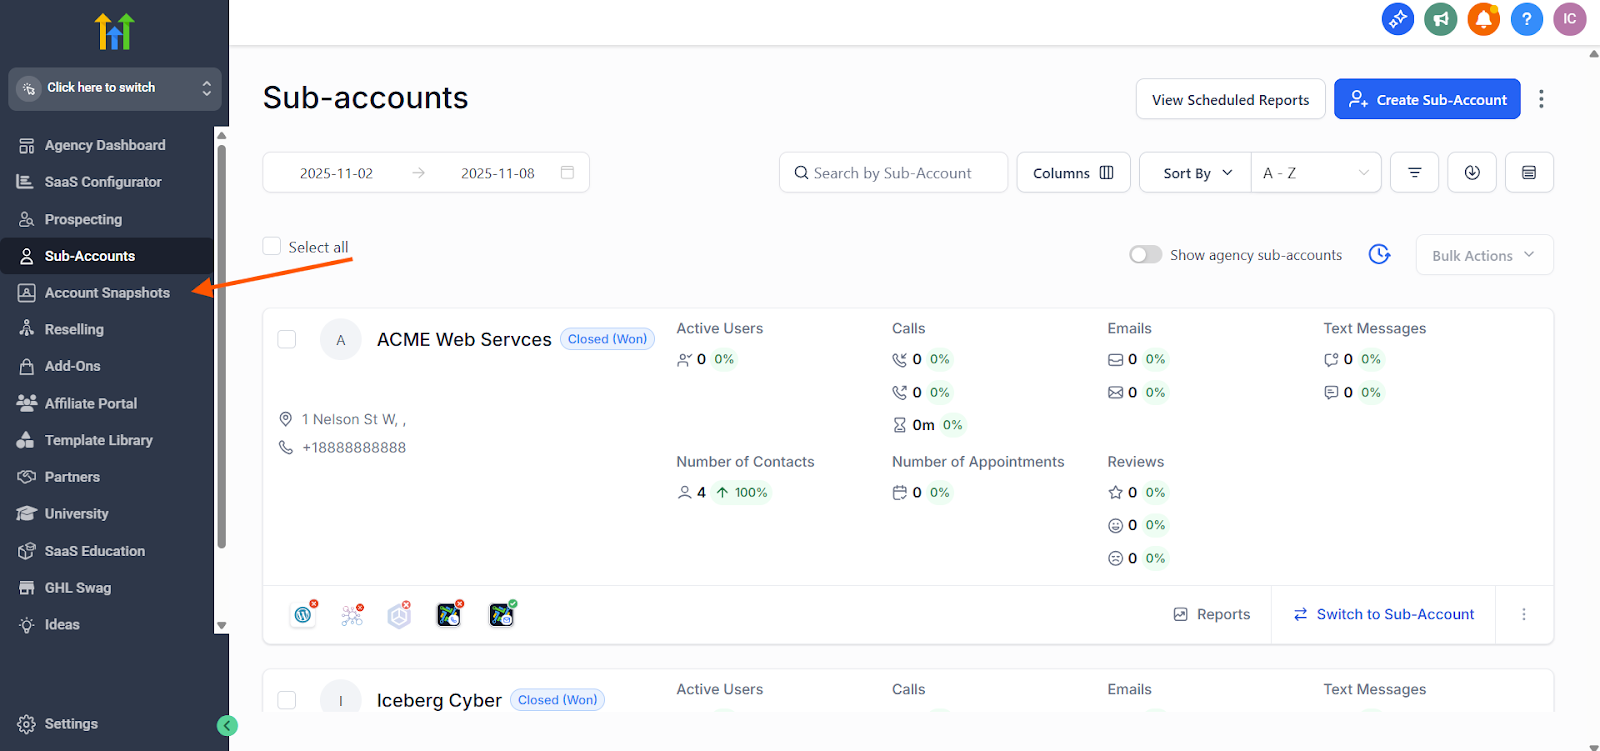
2. Click on Account Snapshots from the left sidebar
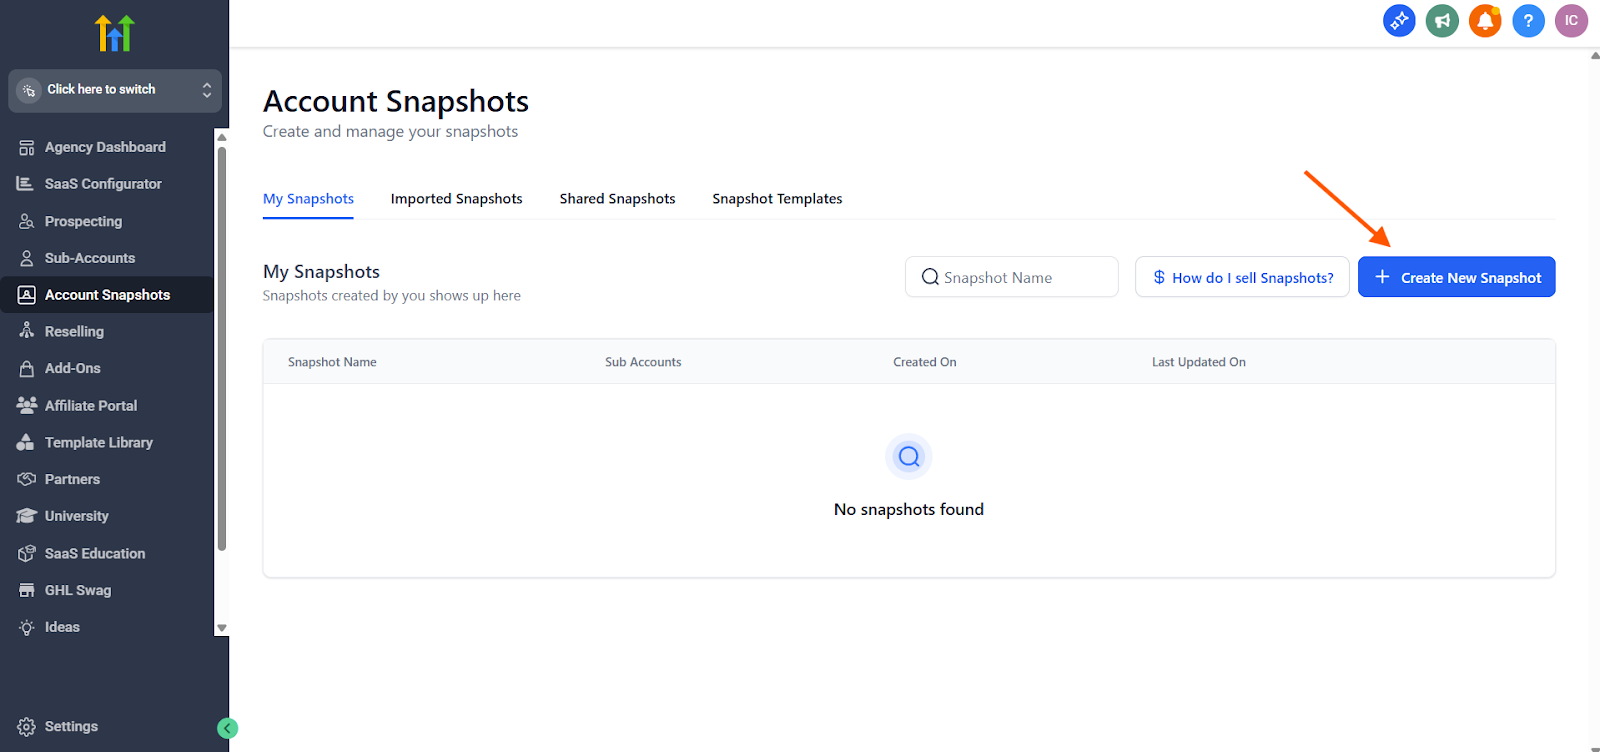
3. Click Create New Snapshot
4. Enter a descriptive name for your snapshot (e.g., "Cyber Score")
5. From the Sub-Account dropdown, select the sub-account where you created the original Cyber Score workflow
6. Click Next
7. Once it's done loading, scroll down the List of Assets
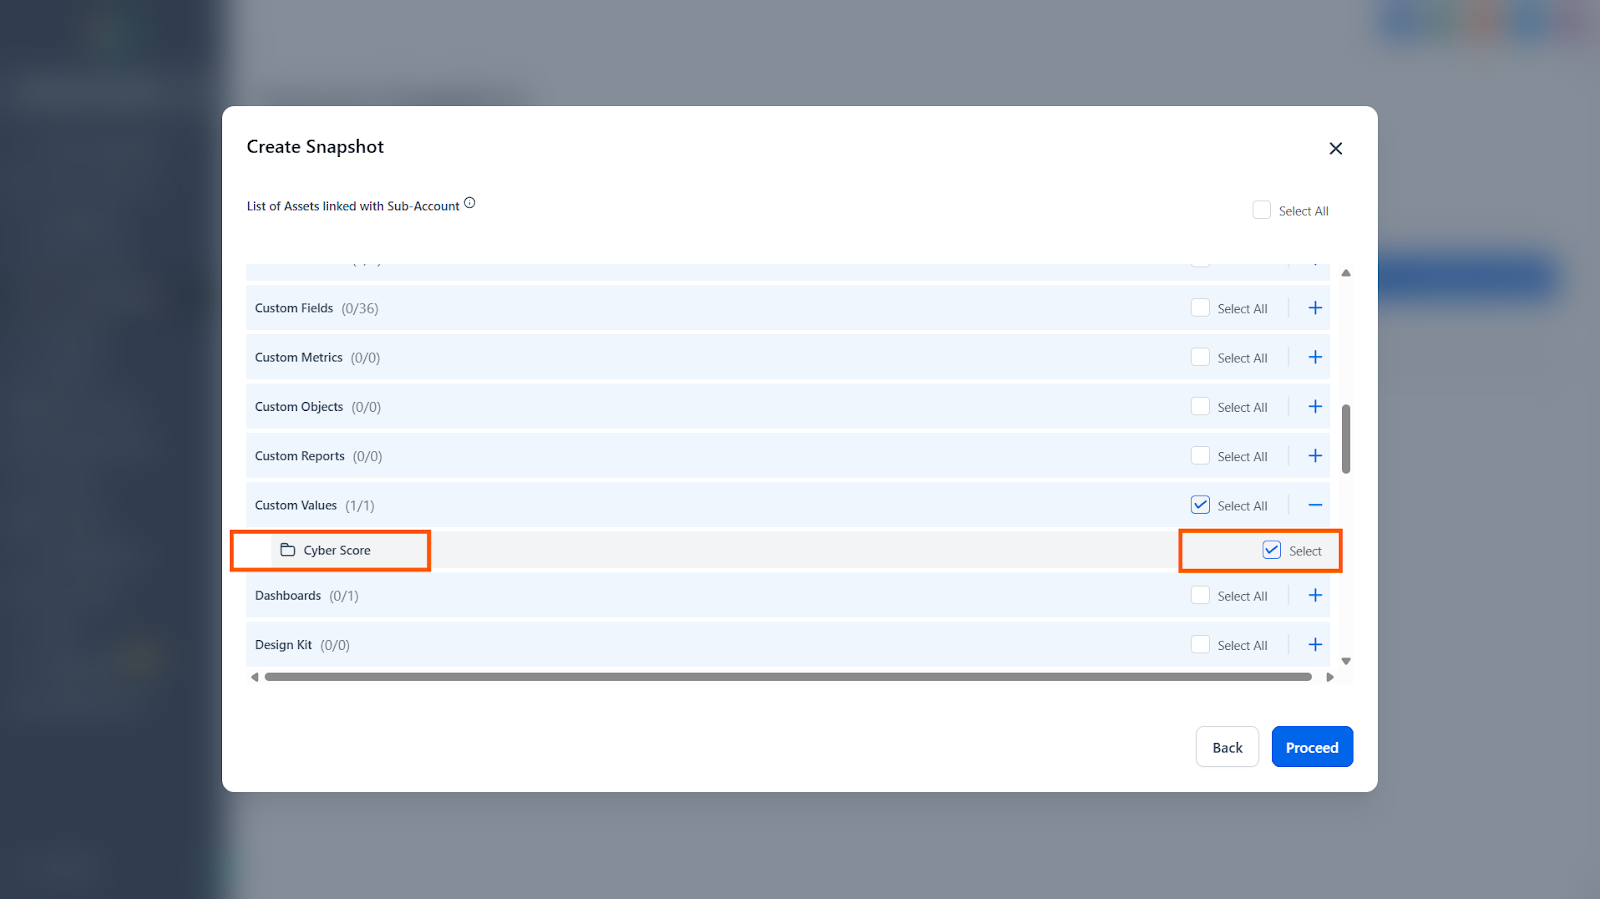
8. Click the + (plus) icon next to Custom Values
9. Check the select box next to the Cyber Score folder you created
10. Scroll down a little further
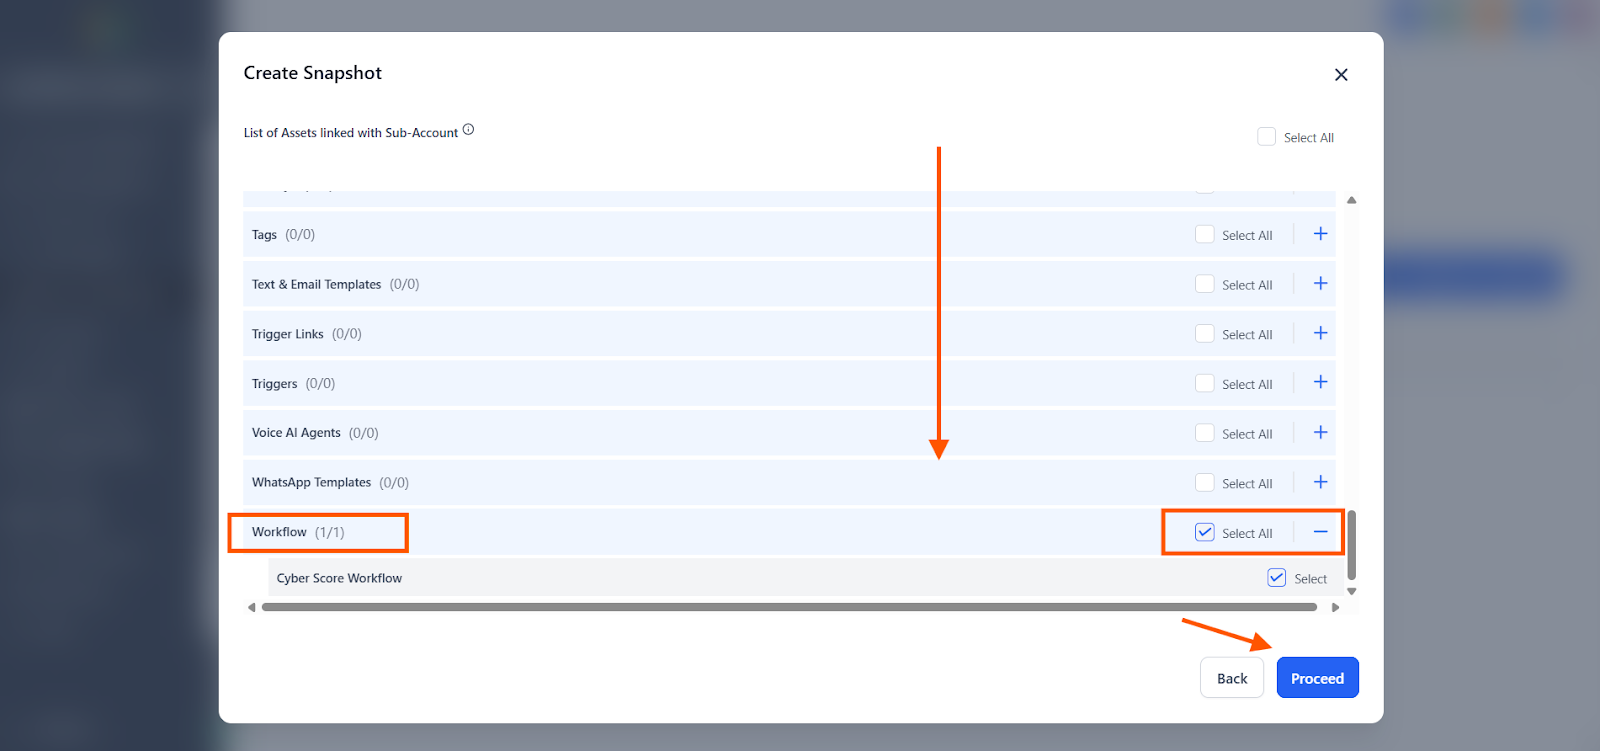
11. Click the + (plus) icon next to Workflow to expand the workflow section
12. Check the select box next to the Cyber Score Workflow you created
13. Click Proceed
Expected Result
Your Cyber Score workflow snapshot has been created and is ready to be deployed to other sub-accounts.
Step 2: Load Snapshot to Sub-Accounts
For each client sub-account where you want to add the Cyber Score workflow:
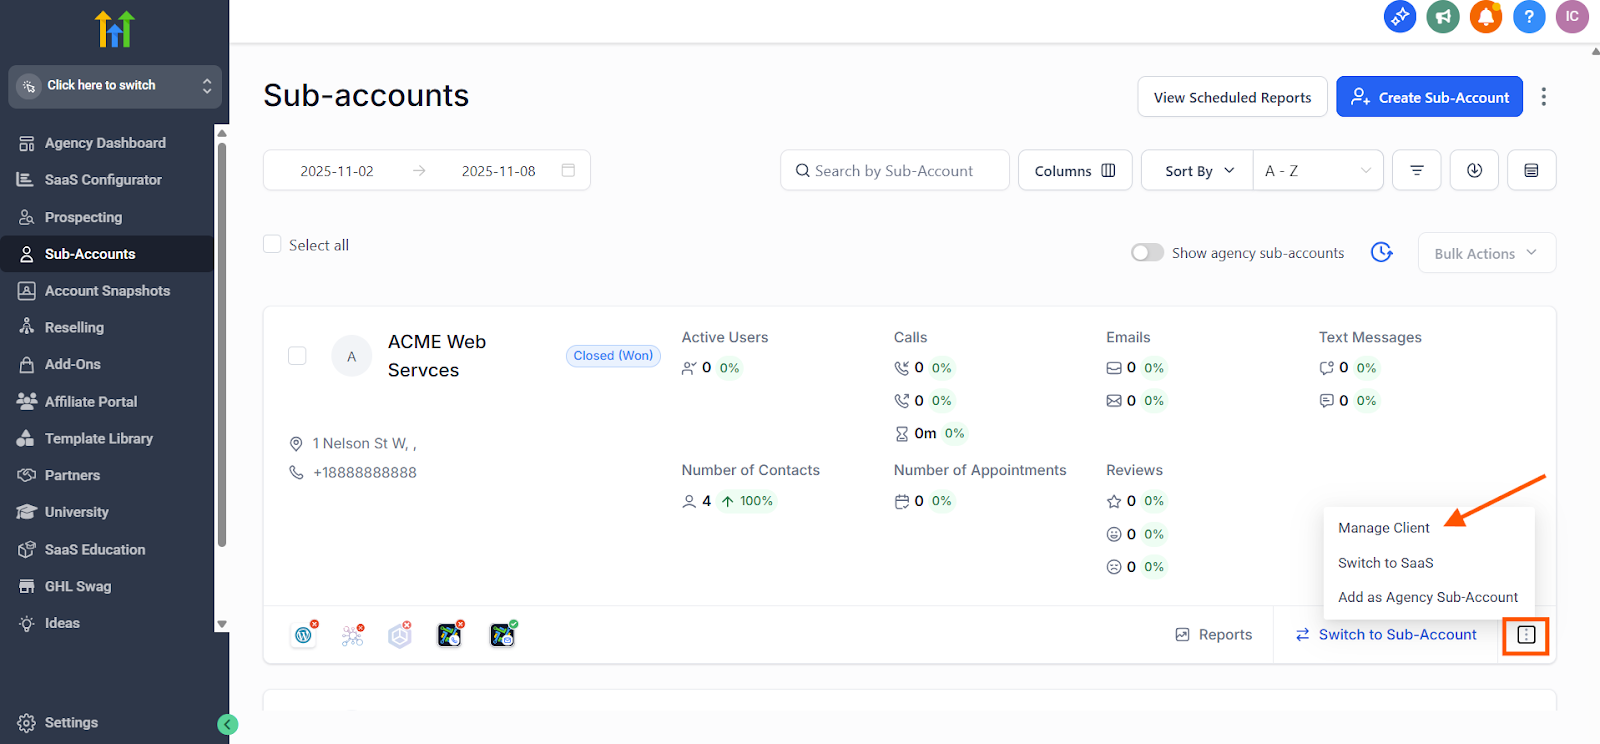
1. Navigate to Sub-Accounts from the left sidebar
2. Click the three dots (⋮) next to the sub-account you want to add the workflow to
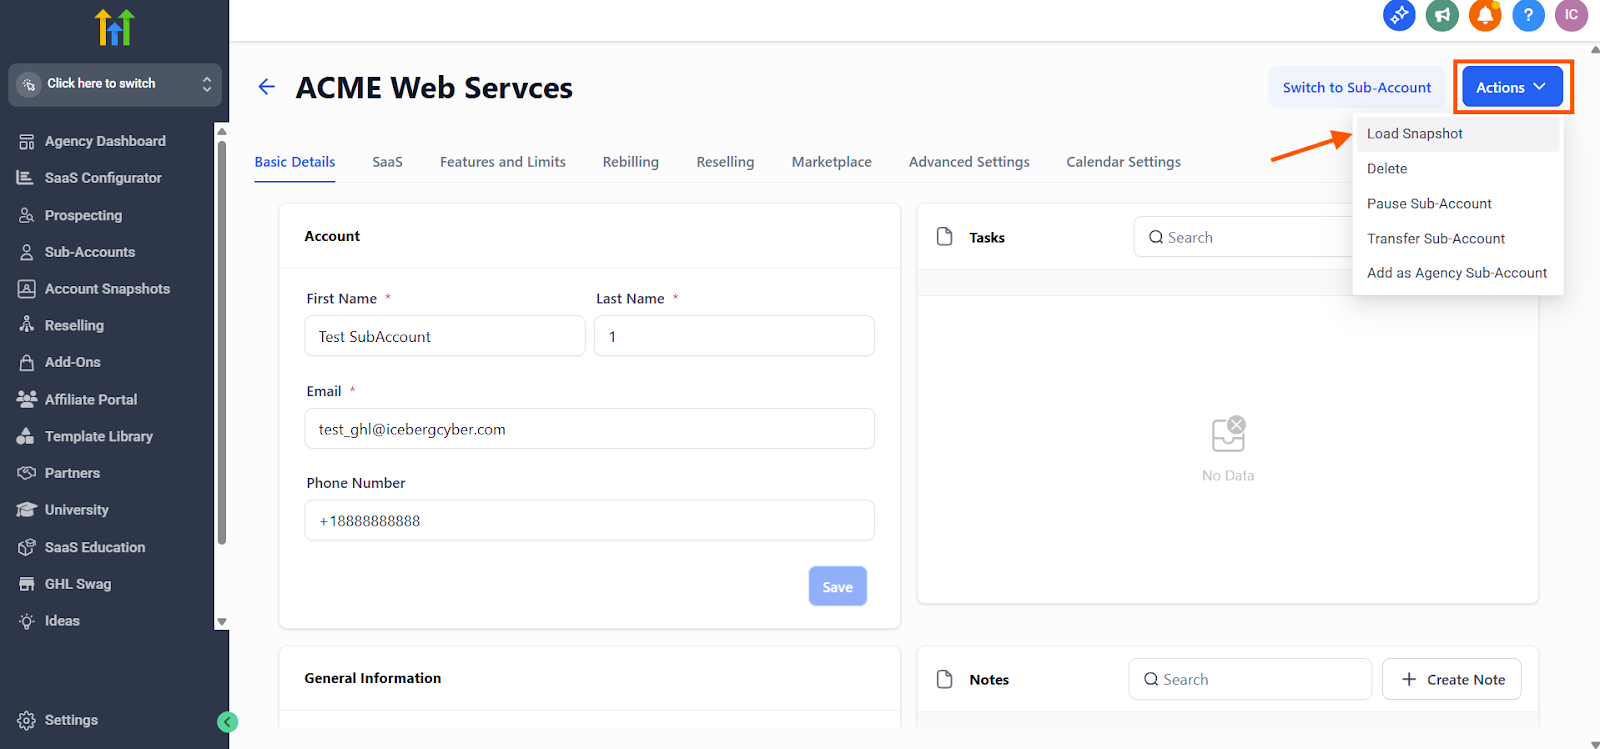
3. Select Manage Client from the dropdown menu
4. Click Actions in the top right corner
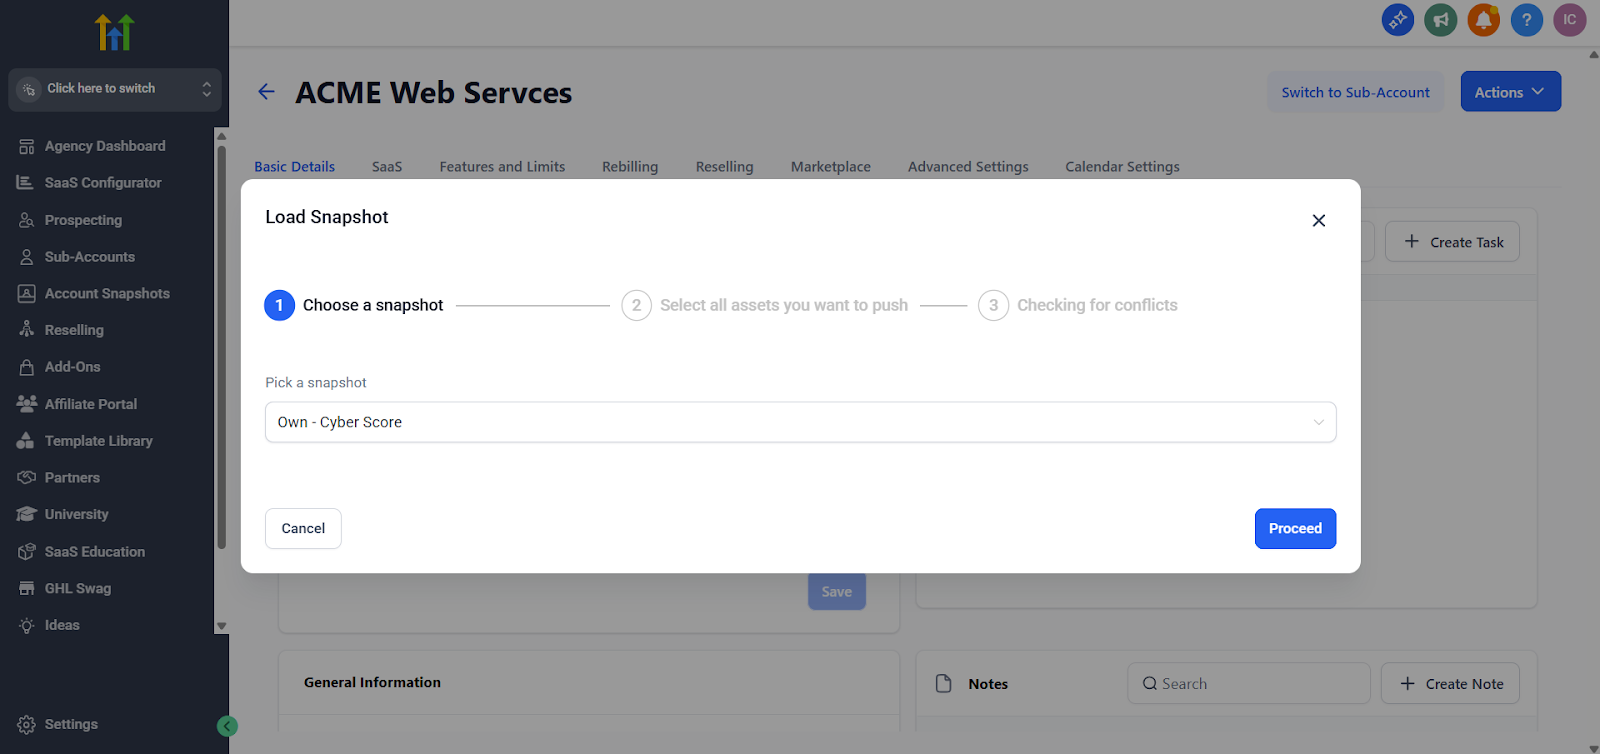
5. Select Load Snapshot from the dropdown
6. From the "Pick a snapshot" dropdown, select the Cyber Score snapshot you just created
7. Click Proceed
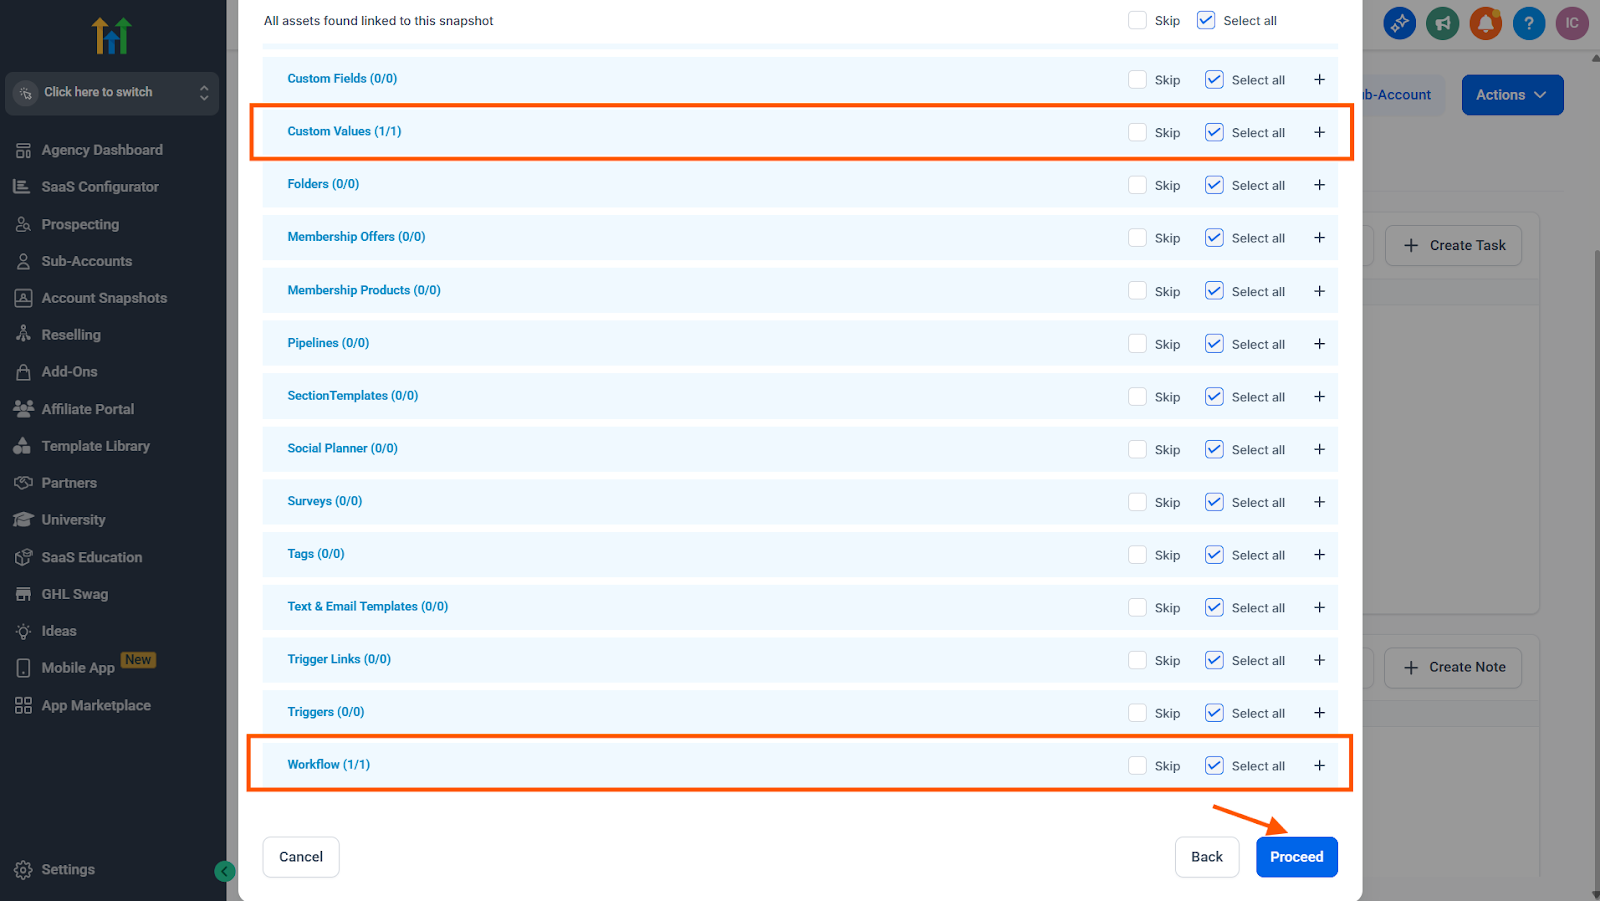
8. Review the assets to be pushed. Verify that:
Under Custom Values, the Cyber Score folder is selected
Under Workflow, the Cyber Score Workflow is selected
9. Click Proceed
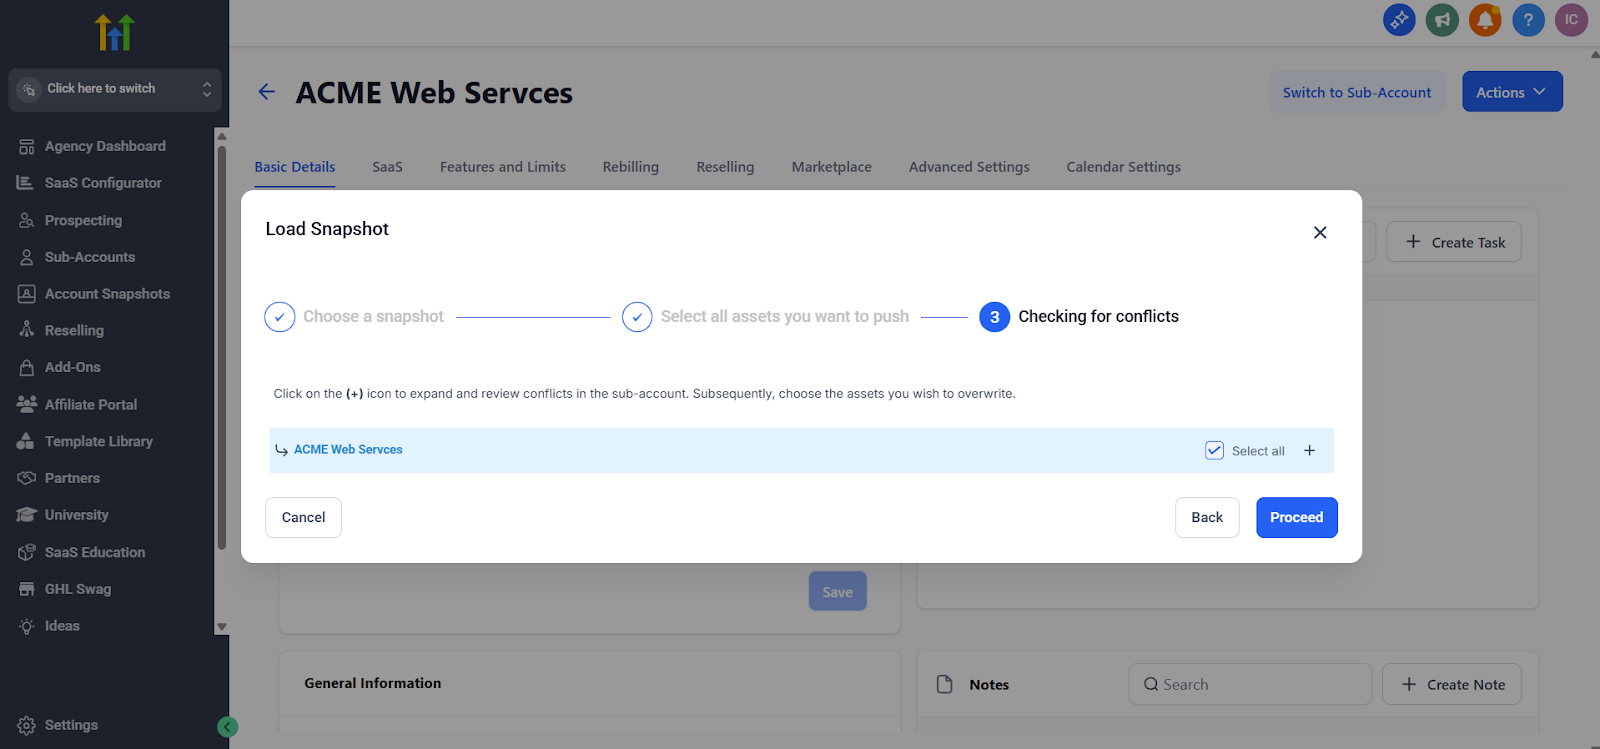
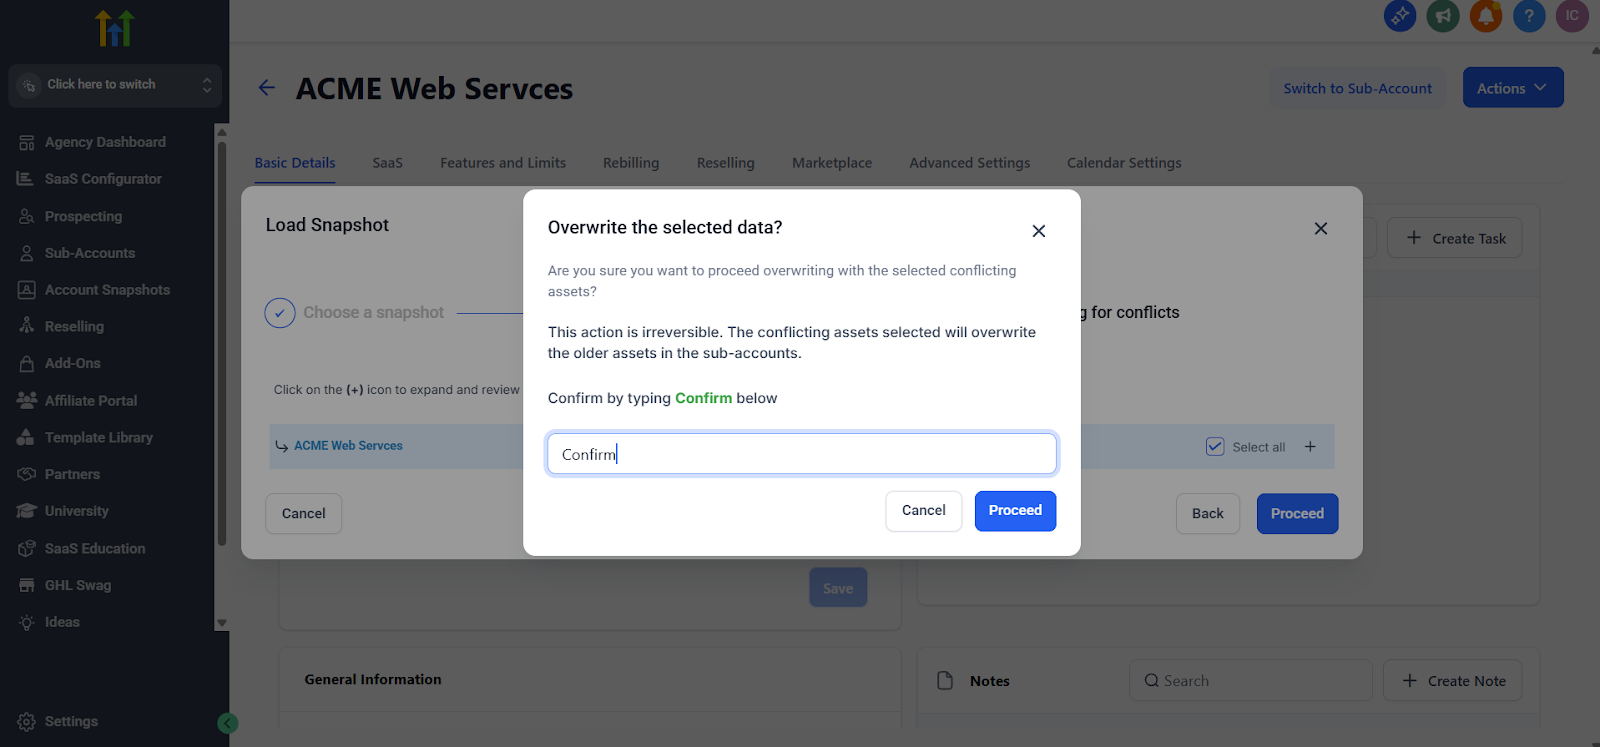
10. On the Checking for conflicts screen, select the sub-account(s) you want to load the snapshot to and click Proceed
11. In the confirmation dialog, type "Confirm" in the text field
12. Click Proceed
Expected Result
The Cyber Score workflow and folder have been successfully deployed to the selected sub-account(s). The workflow will appear in that sub-account(s) shortly.
How to View Cyber Score Data in GoHighLevel
Once the integration is active and the automation workflow is configured, Cyber Score data will be automatically enrich your GoHighLevel contact records.
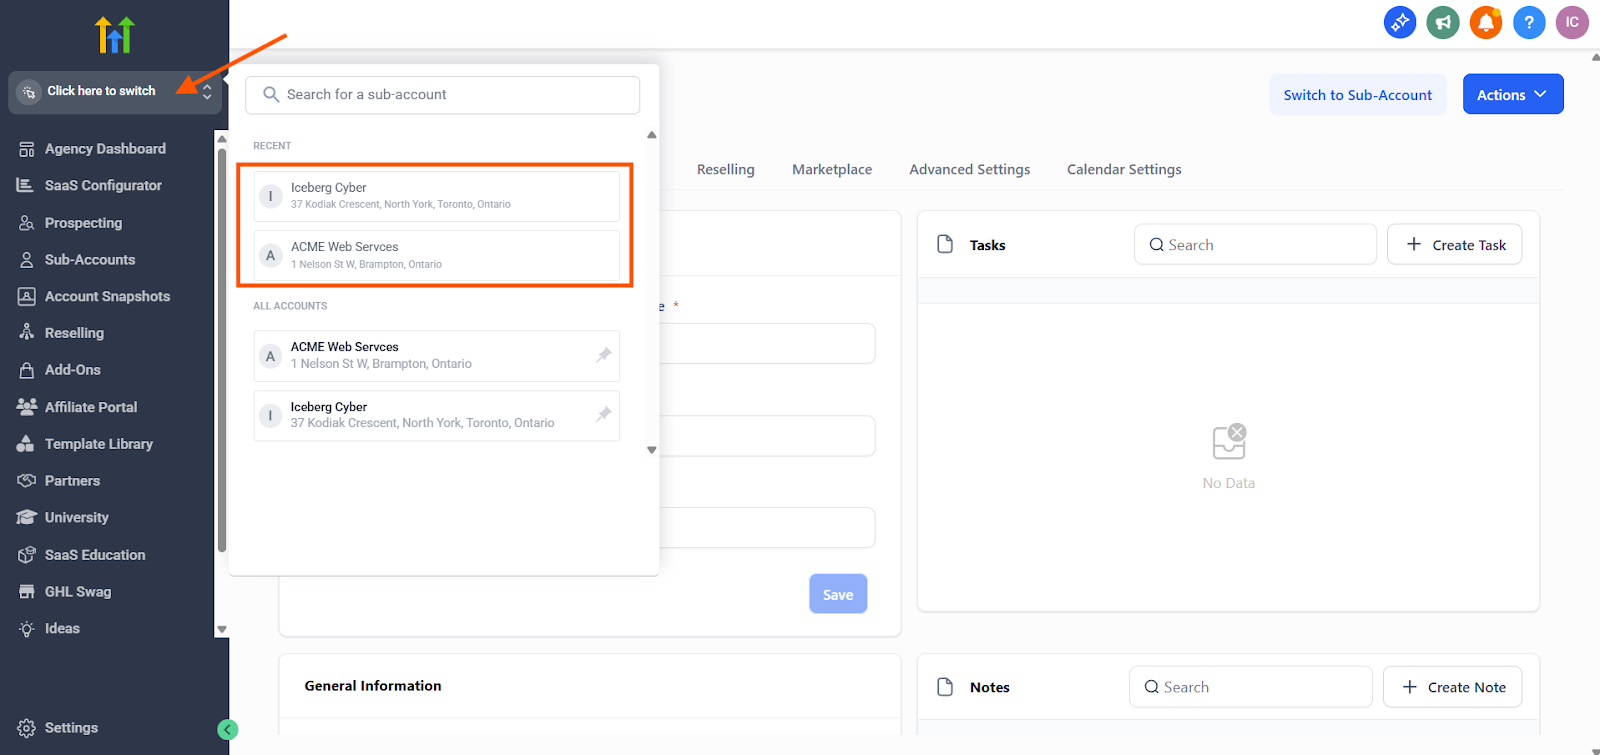
1. Switch to a sub-account from the side menu
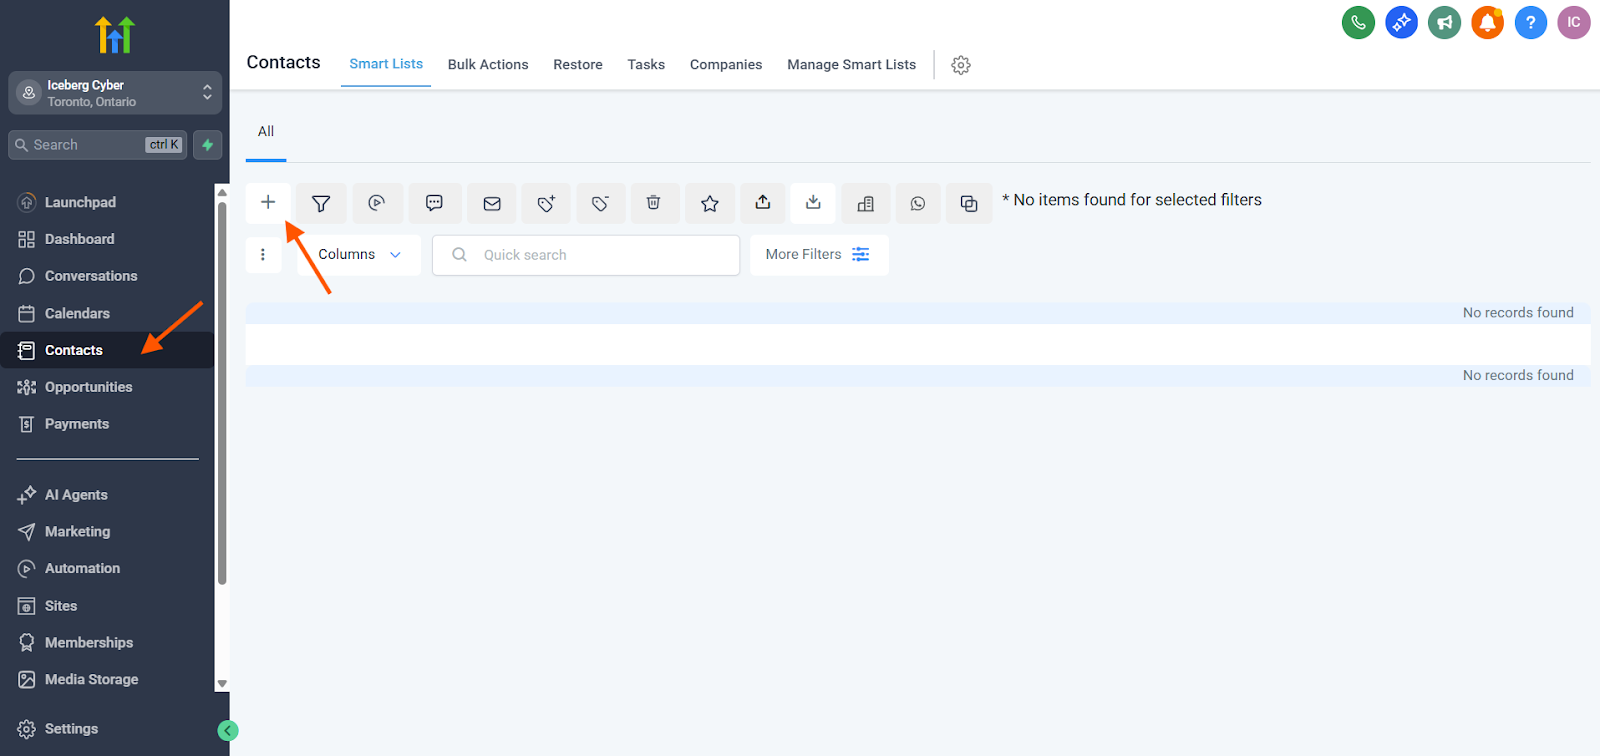
2. Click on Contacts
3. Click the + (plus) sign to add a new contact, or select an existing contact
4. Click on a contact to view their details
5. Expand the contact's Additional Info section
6. Once the domain is processed, the contact will be enriched with Cyber Score sales intelligence
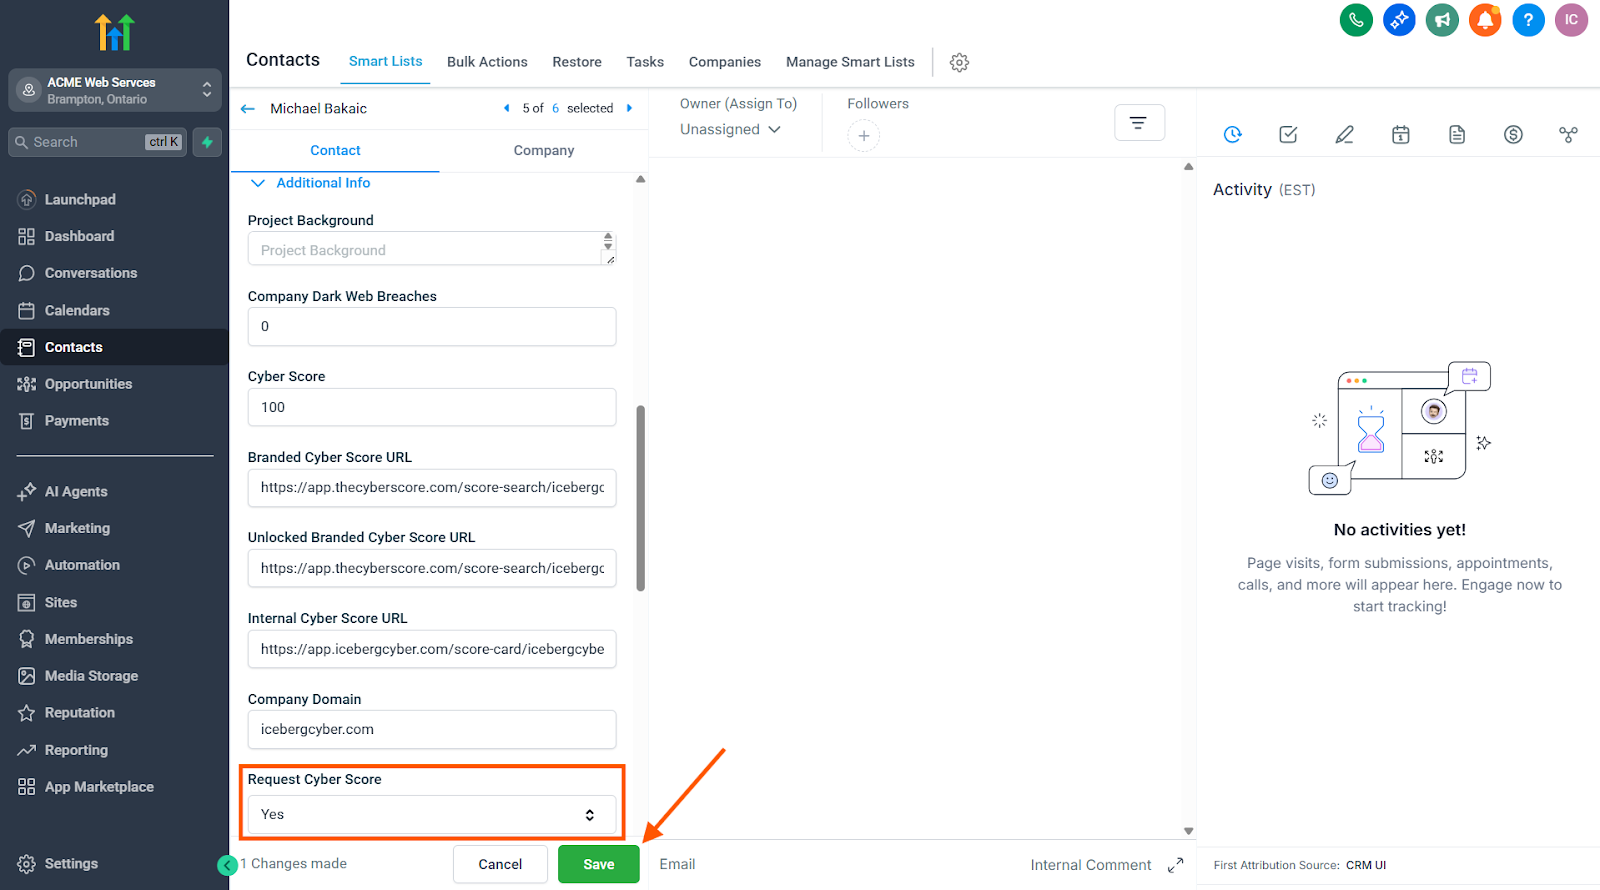
Requesting Cyber Scores for Existing Contacts
To request Cyber Scores for contacts that were added before the integration was activated:
1. Open the contact record and open Additional Info
2. Locate the Request Cyber Score field
3. Switch the value to Yes
4. Click Save
Expected Result
The Cyber Score data will populate automatically for that contact as soon as it's processed. All the Cyber Score fields will be updated with the latest cyber sales intelligence.
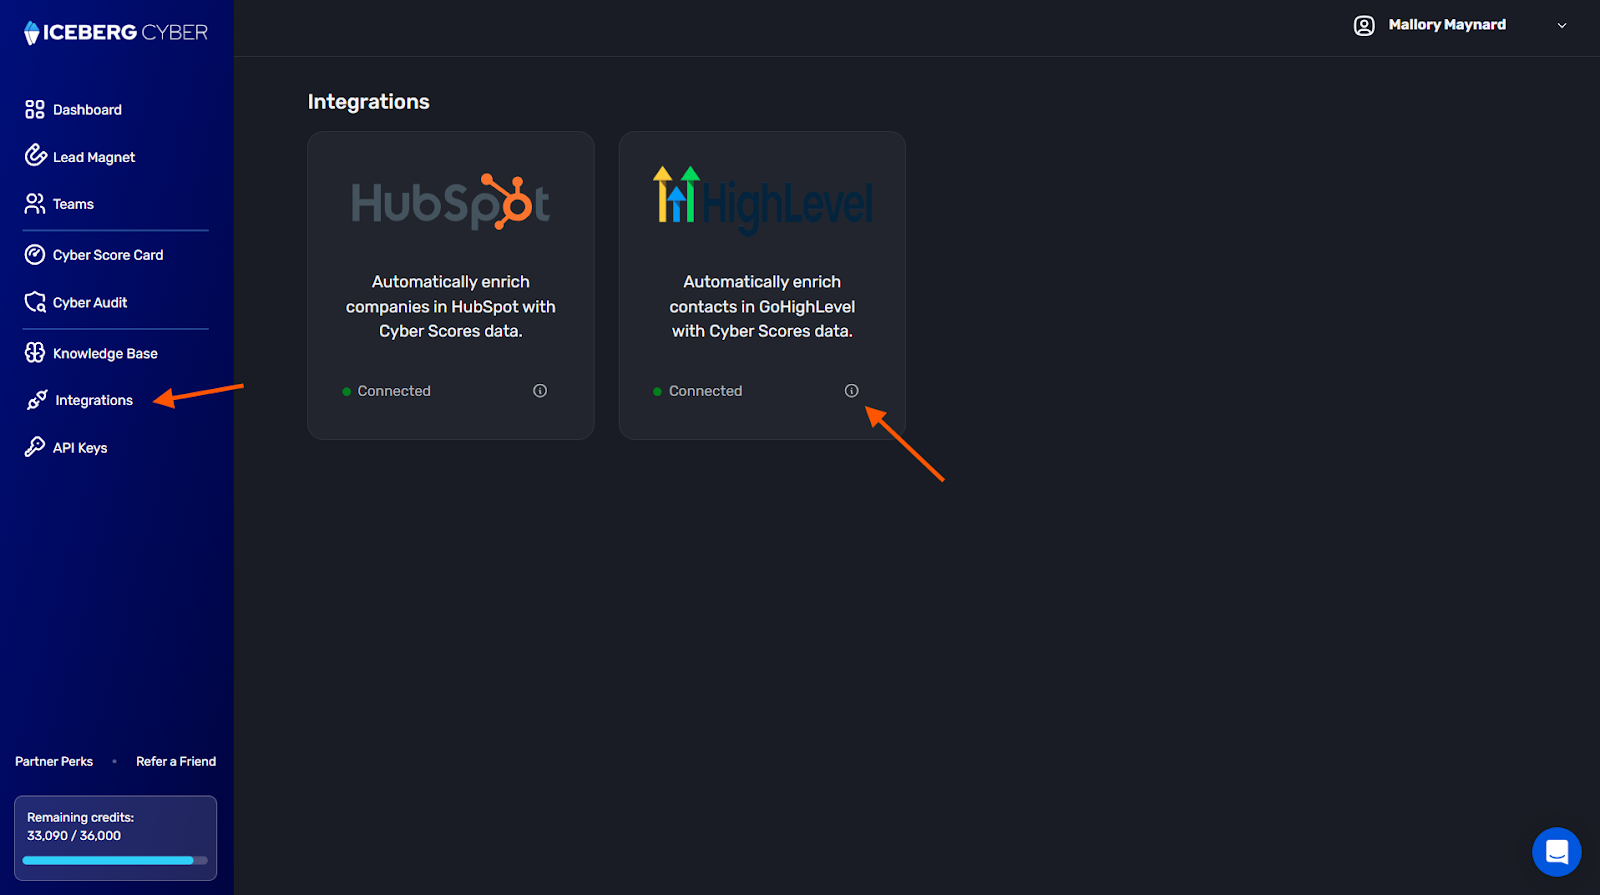
How to Disconnect GoHighLevel from Cyber Score
1. Navigate to the Iceberg Cyber app
2. Click on Integrations from the side menu
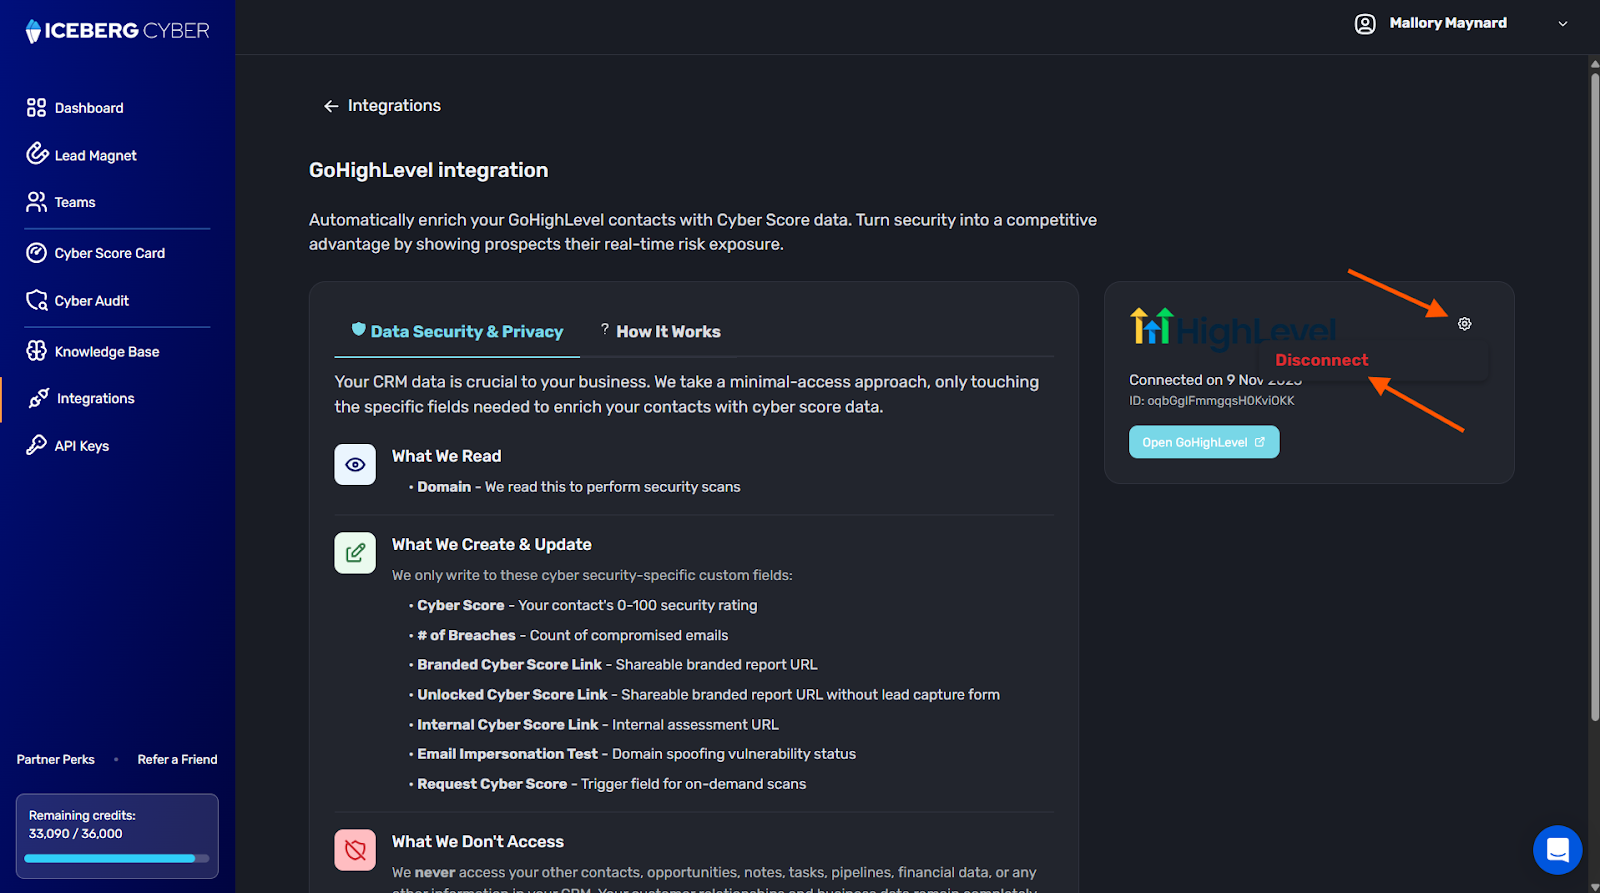
3. Click on the 🛈 (info) button on GoHighLevel
4. Click the Settings button (gear icon) in the top right corner
5. Click Disconnect
Expected Result
The integration is removed. Cyber Score will no longer automatically enrich GoHighLevel contacts with cyber sales intelligence. Any existing Cyber Score data in your GoHighLevel contacts will remain, but new contacts will not be enriched.