
Start using Cyber to power your prospecting.
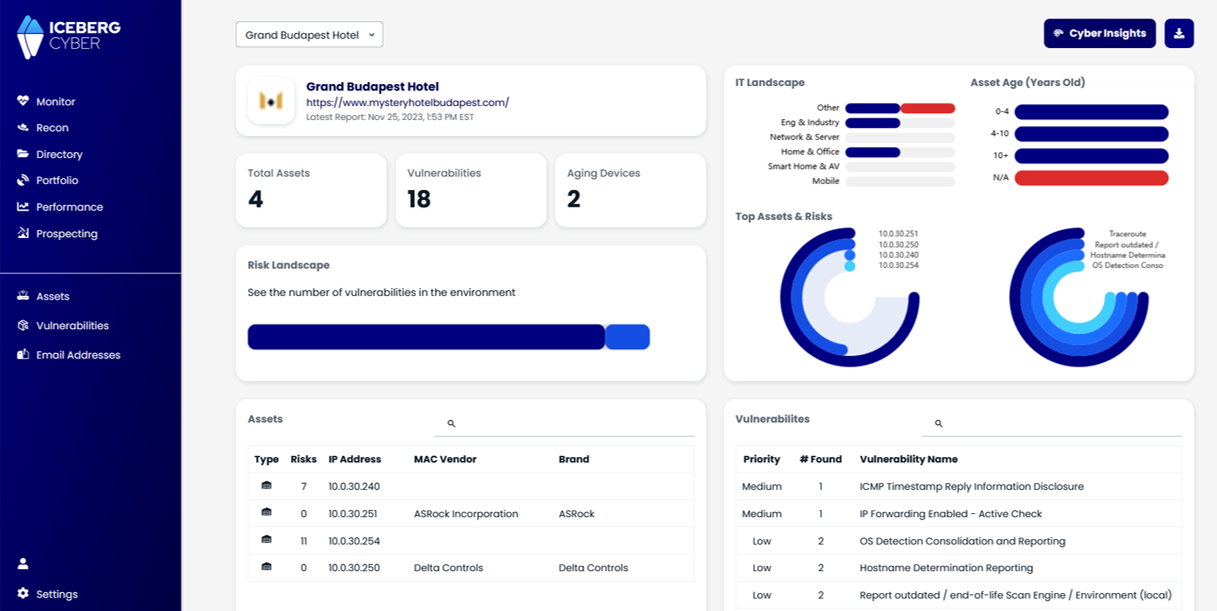
Collaborate on campaigns and share credits with your team members by creating and managing teams.
Teams allow you to collaborate with colleagues by sharing access to campaigns and credits. Each user can create one team as an owner and join multiple teams as a member or admin.
Important: If you want to share your plan credits with team members, the person with the paid subscription should create and own the team. This ensures all team members can access the credits associated with your paid plan.
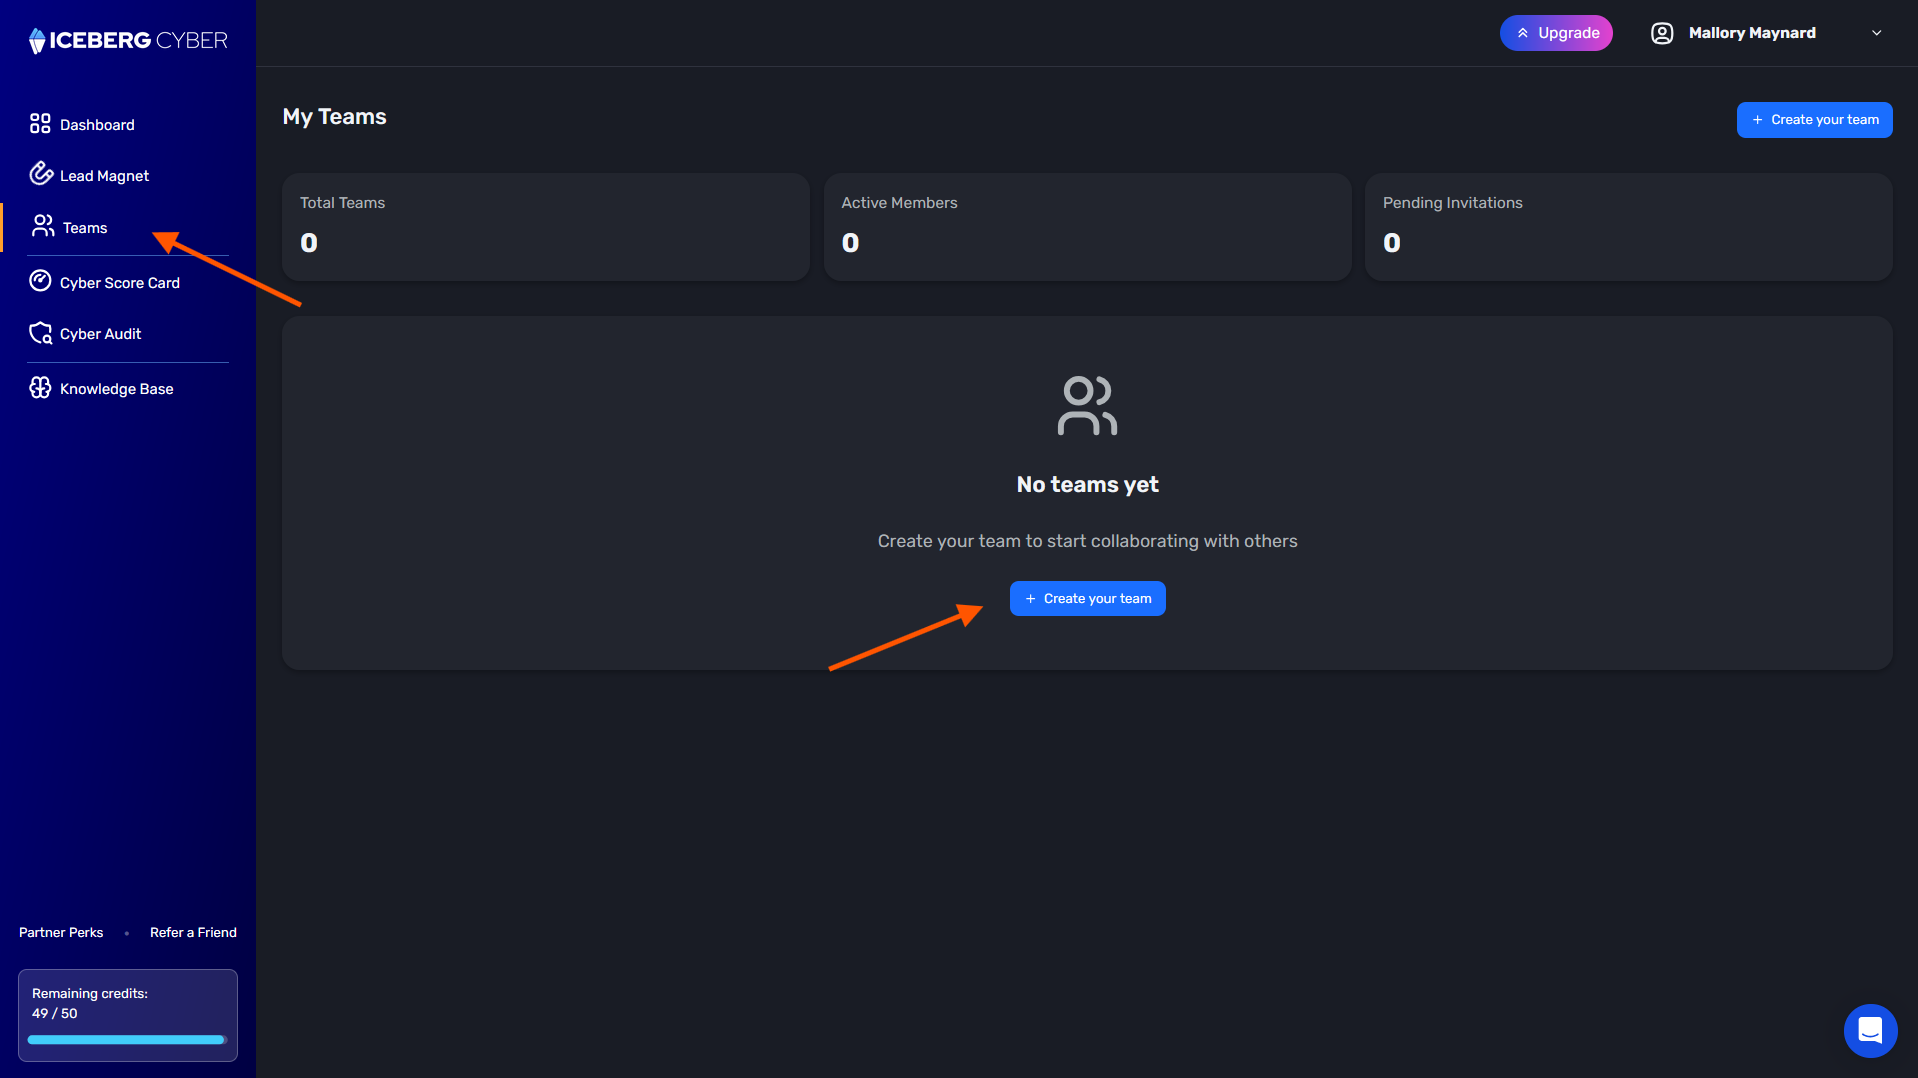
1. Navigate to the Teams page
2. Click the Create your team button
3. Enter your team name
4. Add Team Members (optional)
5. Click Create Team
Note: You can only create one team as an owner. To collaborate on multiple teams, you'll need to be invited by other team owners.

Your new team appears in the Teams list with an "Owner" badge. You can now invite members and manage team settings.
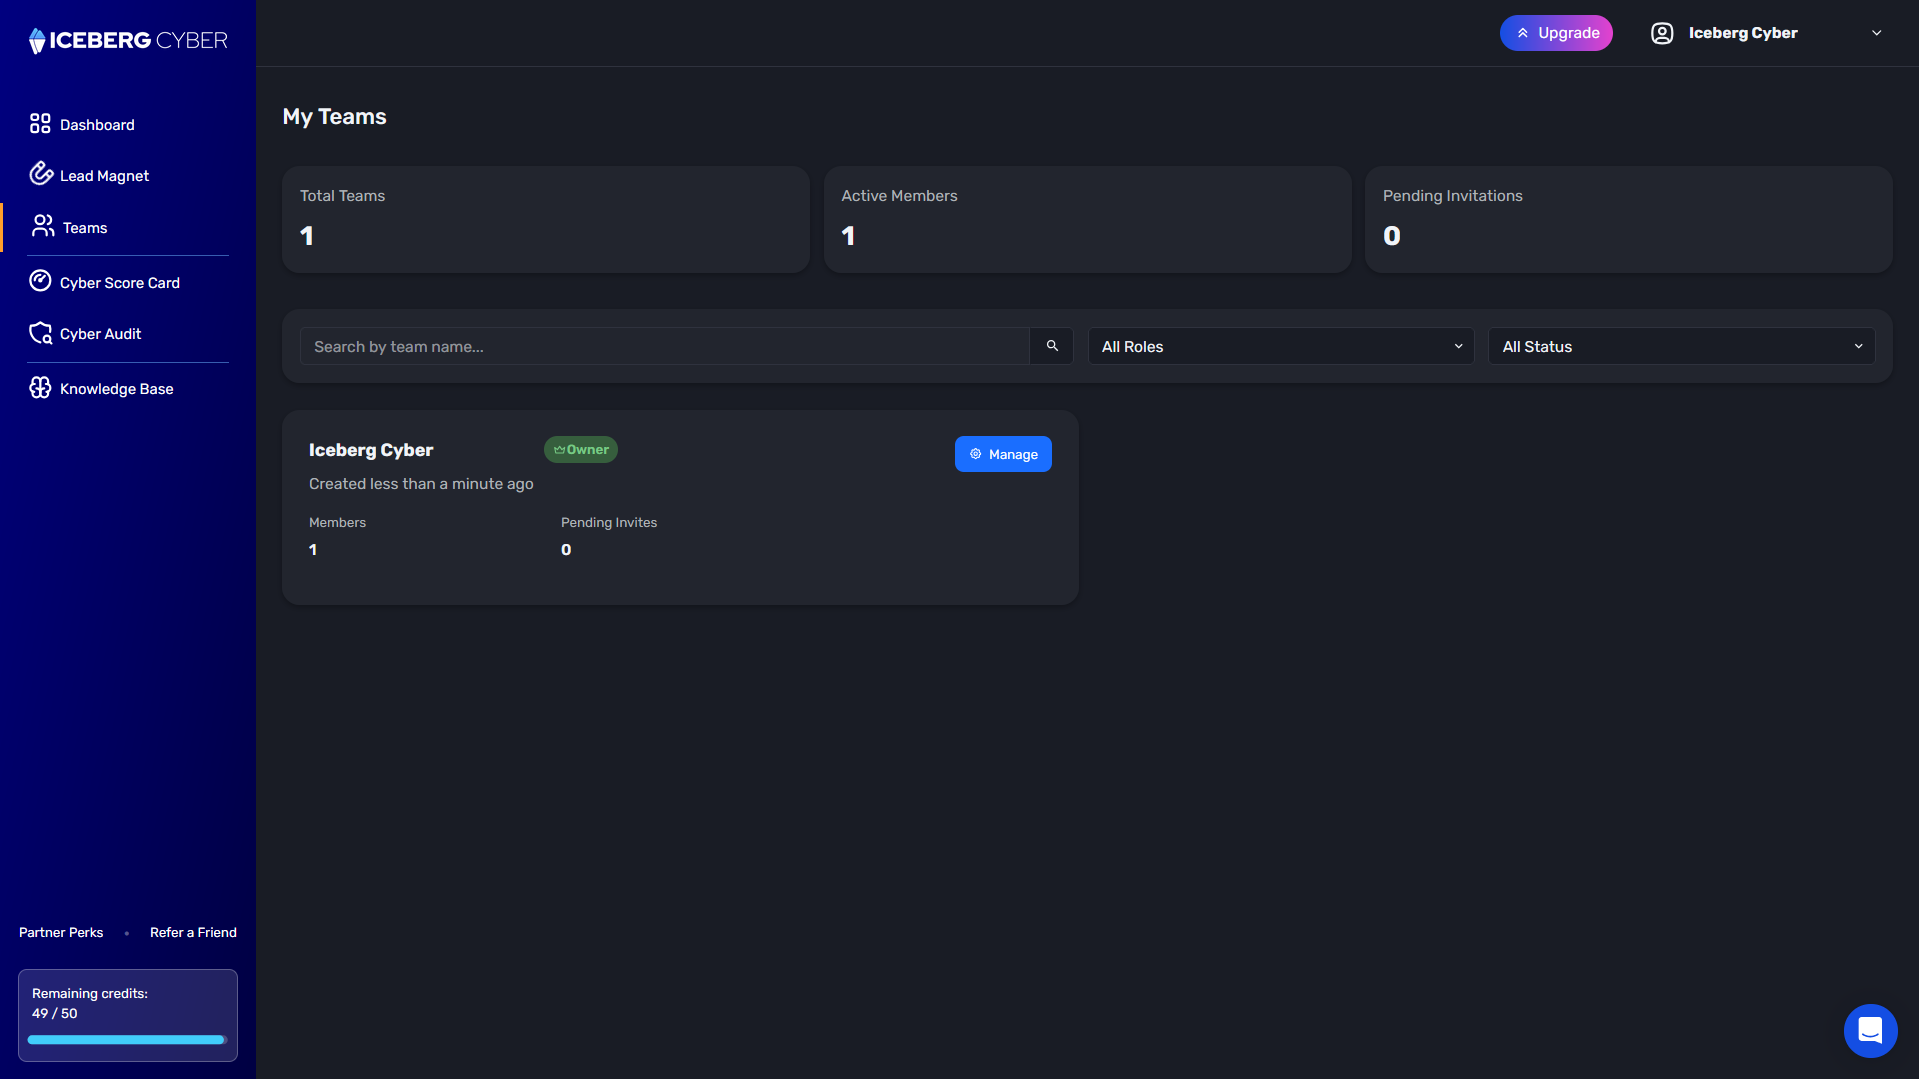
1. Select the team you created by clicking on the team name or the Manage button
2. Click the Invite Members button
3. Enter the email addresses of people to invite
4. Select their role: Admin or Member
5. Add a message to send along with the invitation (optional)
6. Click the Send Invitations button


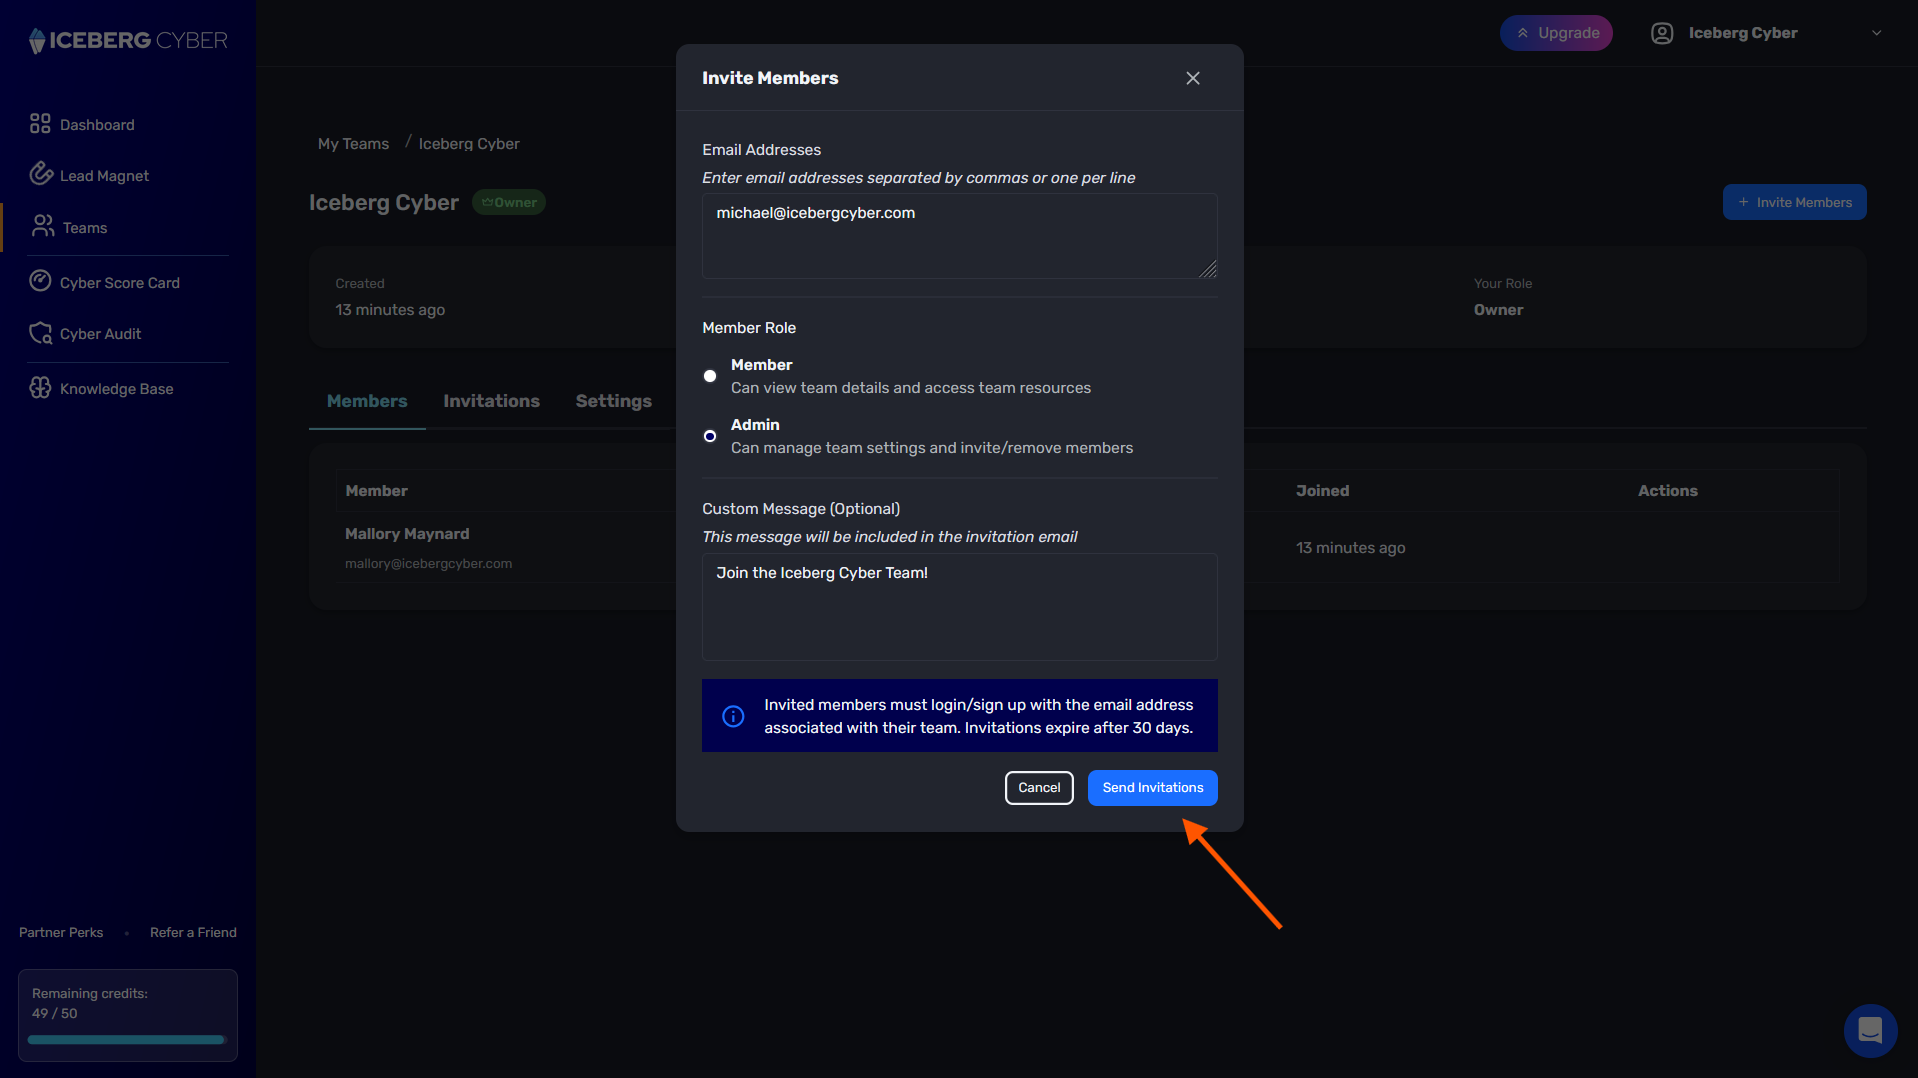
Note: When those users log in, they will be prompted to join the team. Invitations are NOT sent via email. Invited users appear in the Invitations tab until they accept.
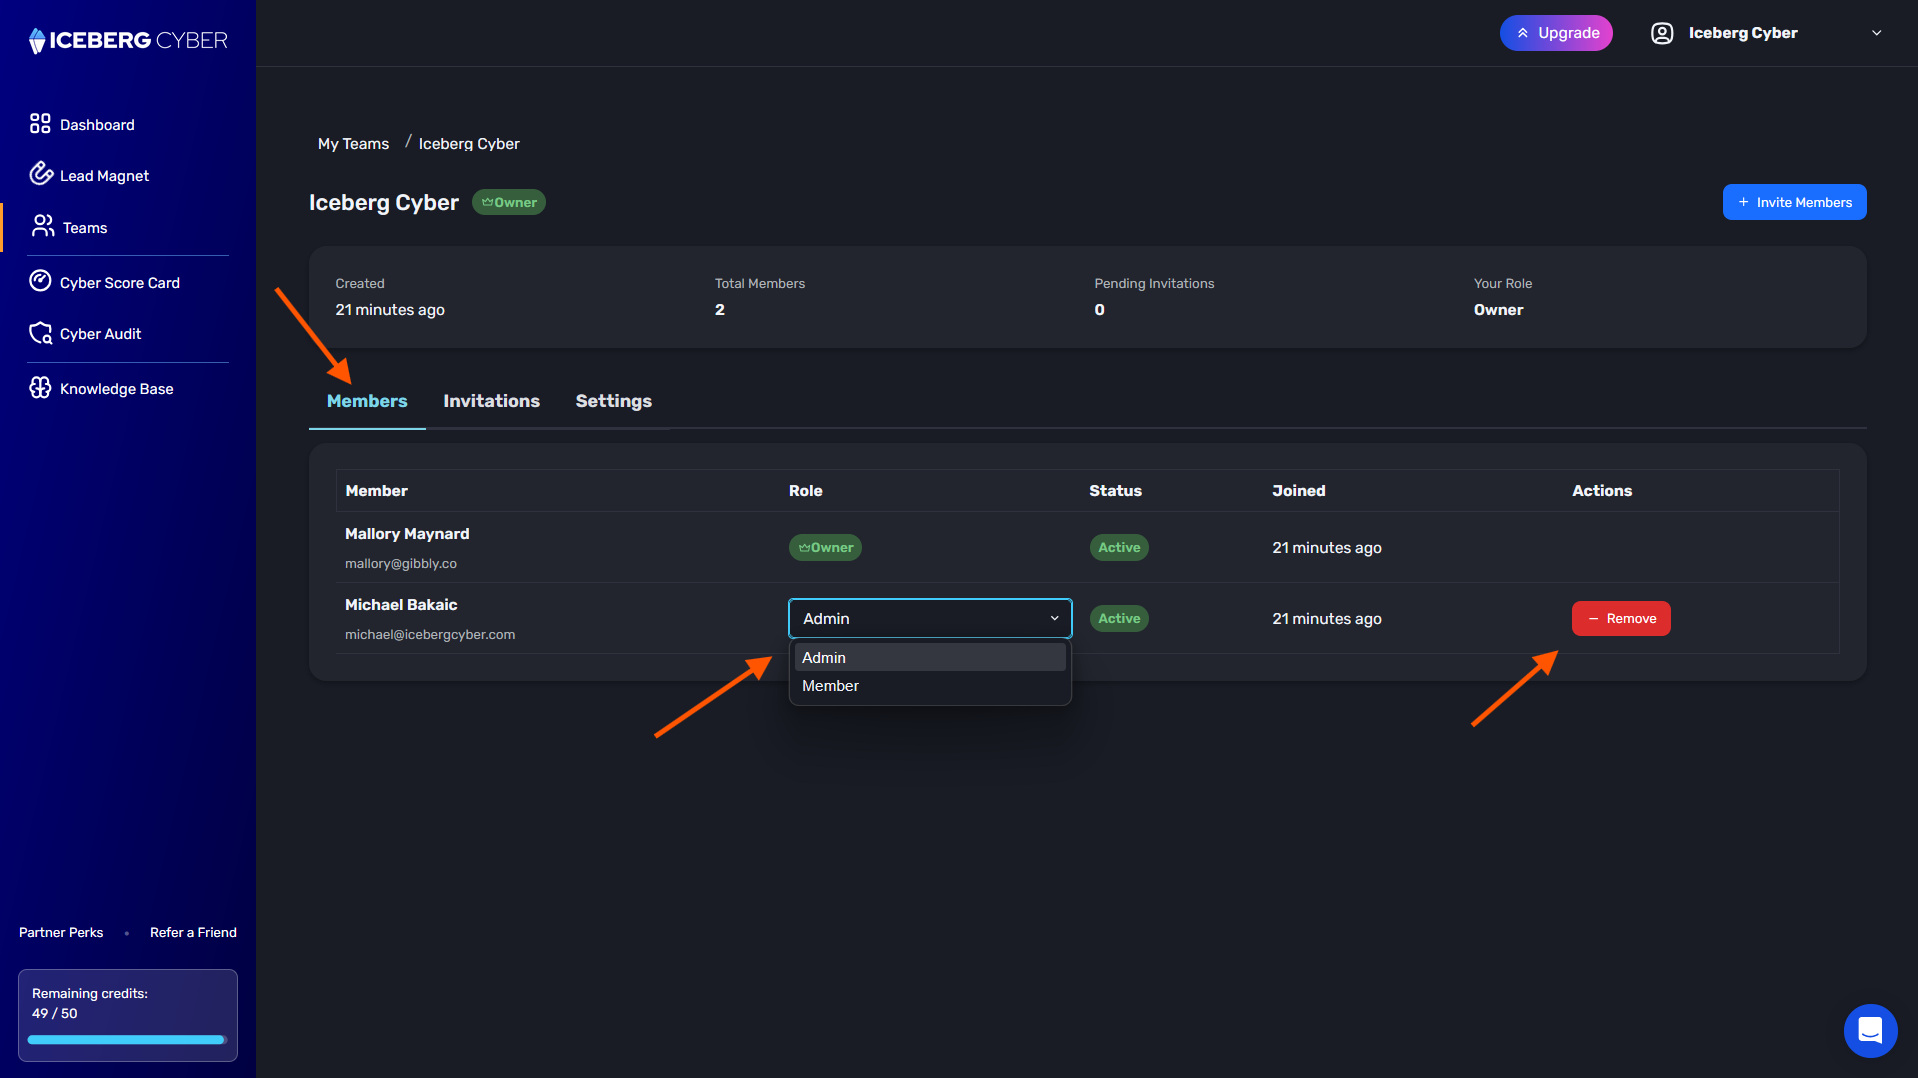
1. On the Members tab
2. View member details including name, email, role, status, and join date
1. Locate the member whose role you want to change
2. Click the role dropdown next to their name
3. Select Admin or Member
Note: You cannot change the Owner's role or your own role.
1. On the Members tab
2. Locate the member to remove
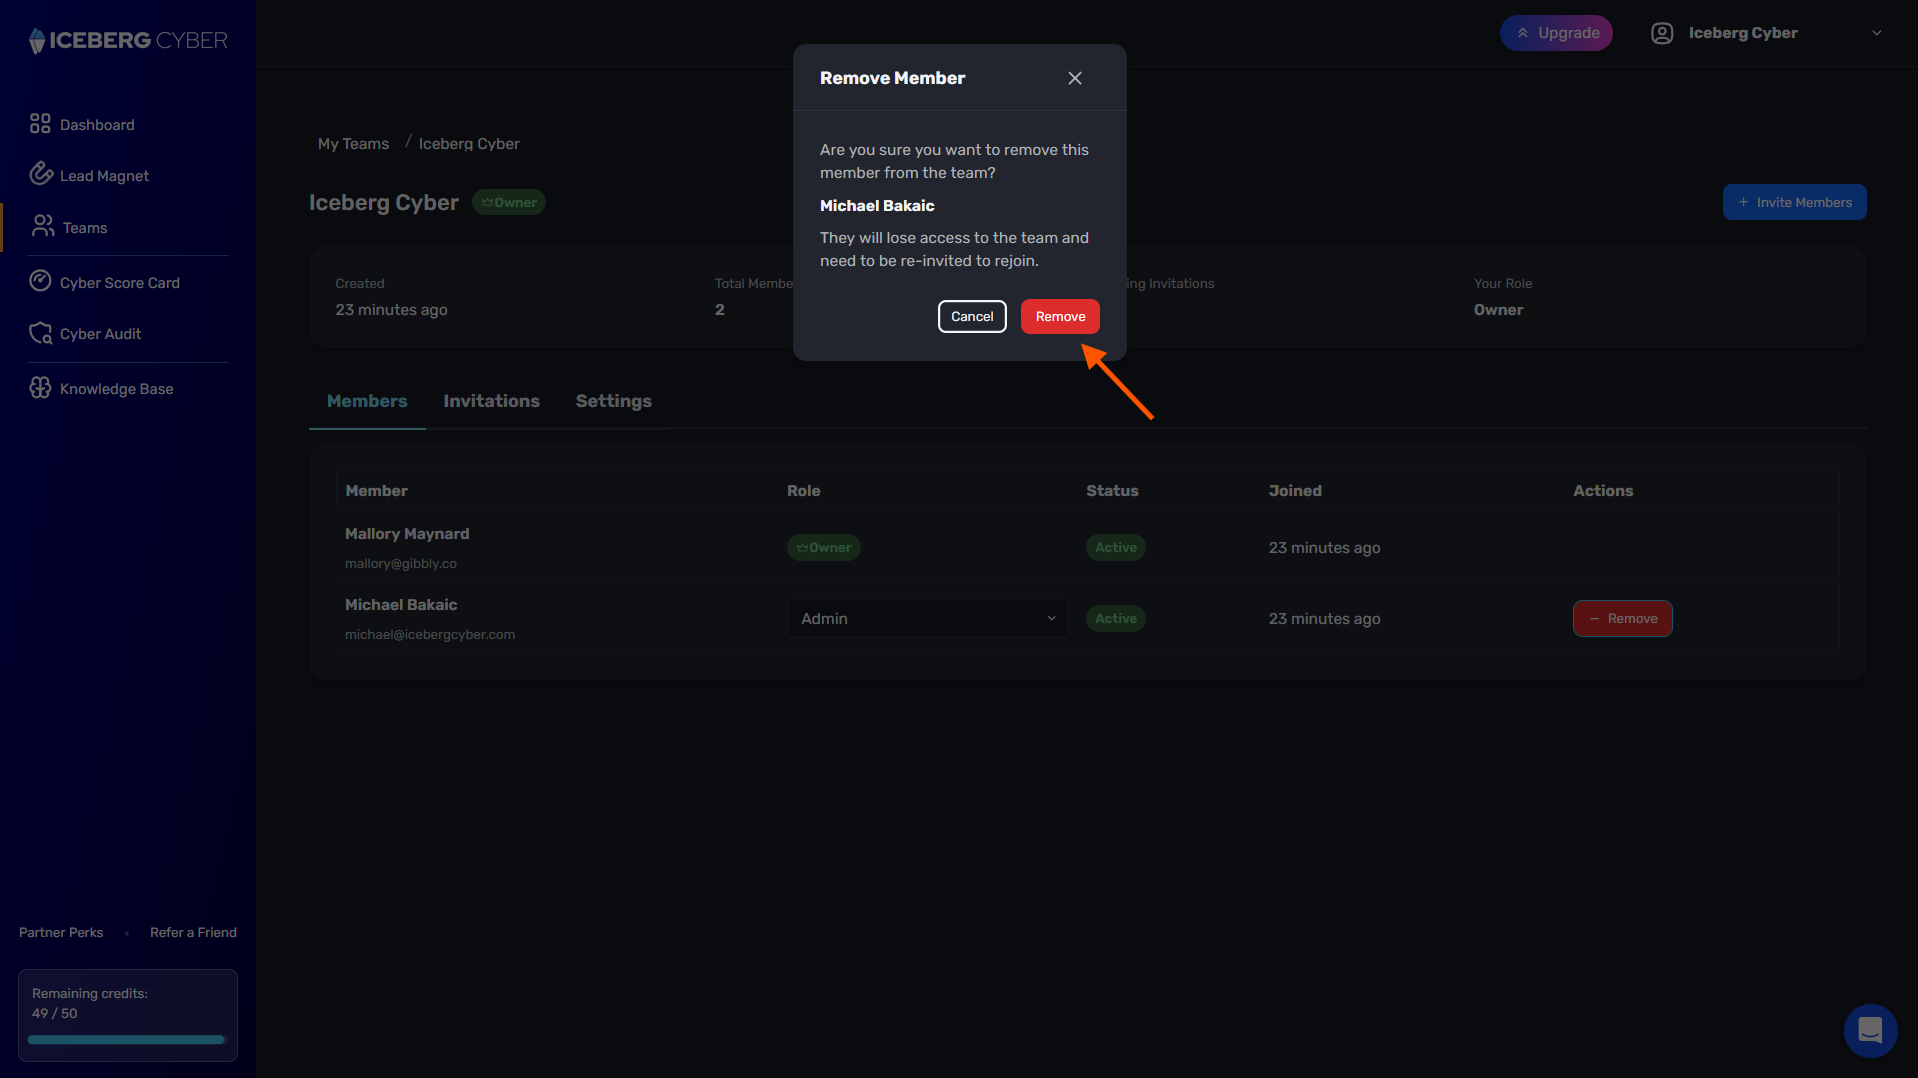
3. Click the Remove button next to their name
4. Confirm the removal in the pop-up box
Note: The member loses access to the team immediately and must be re-invited to rejoin.
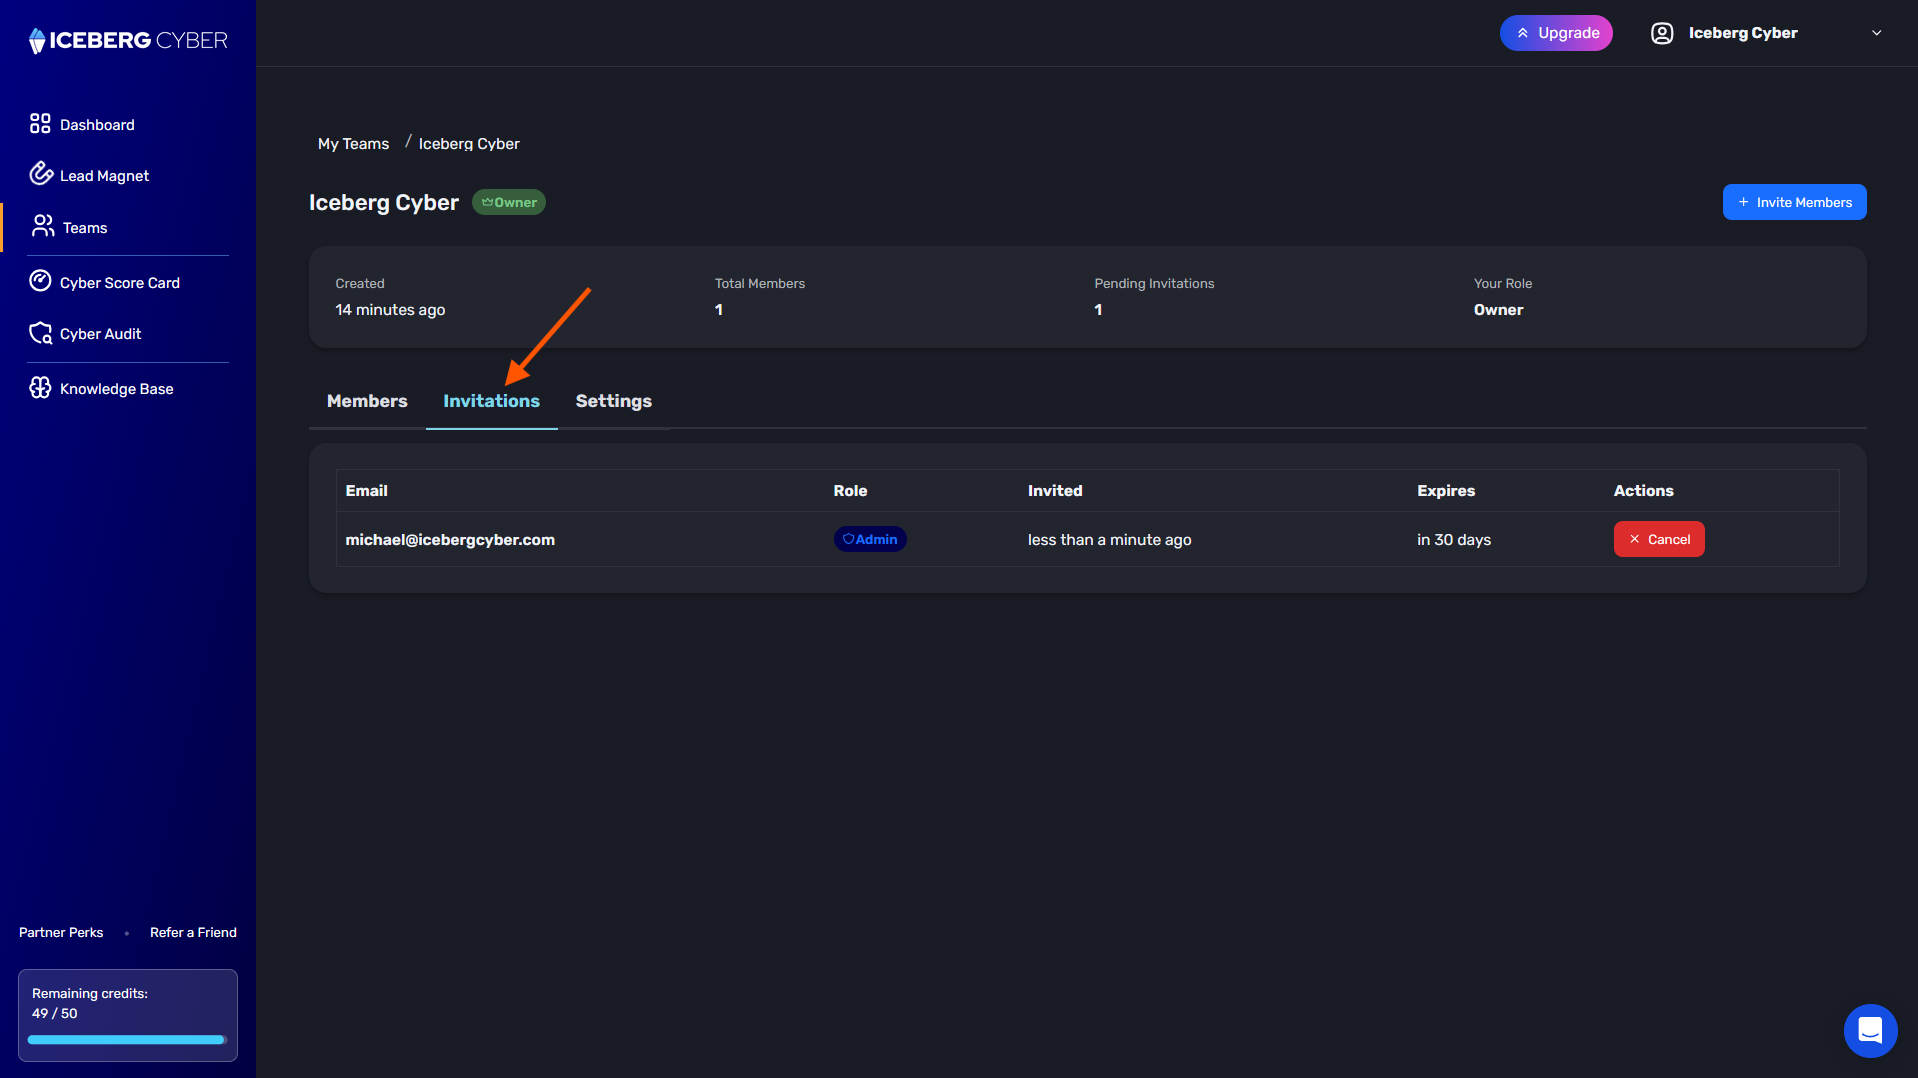
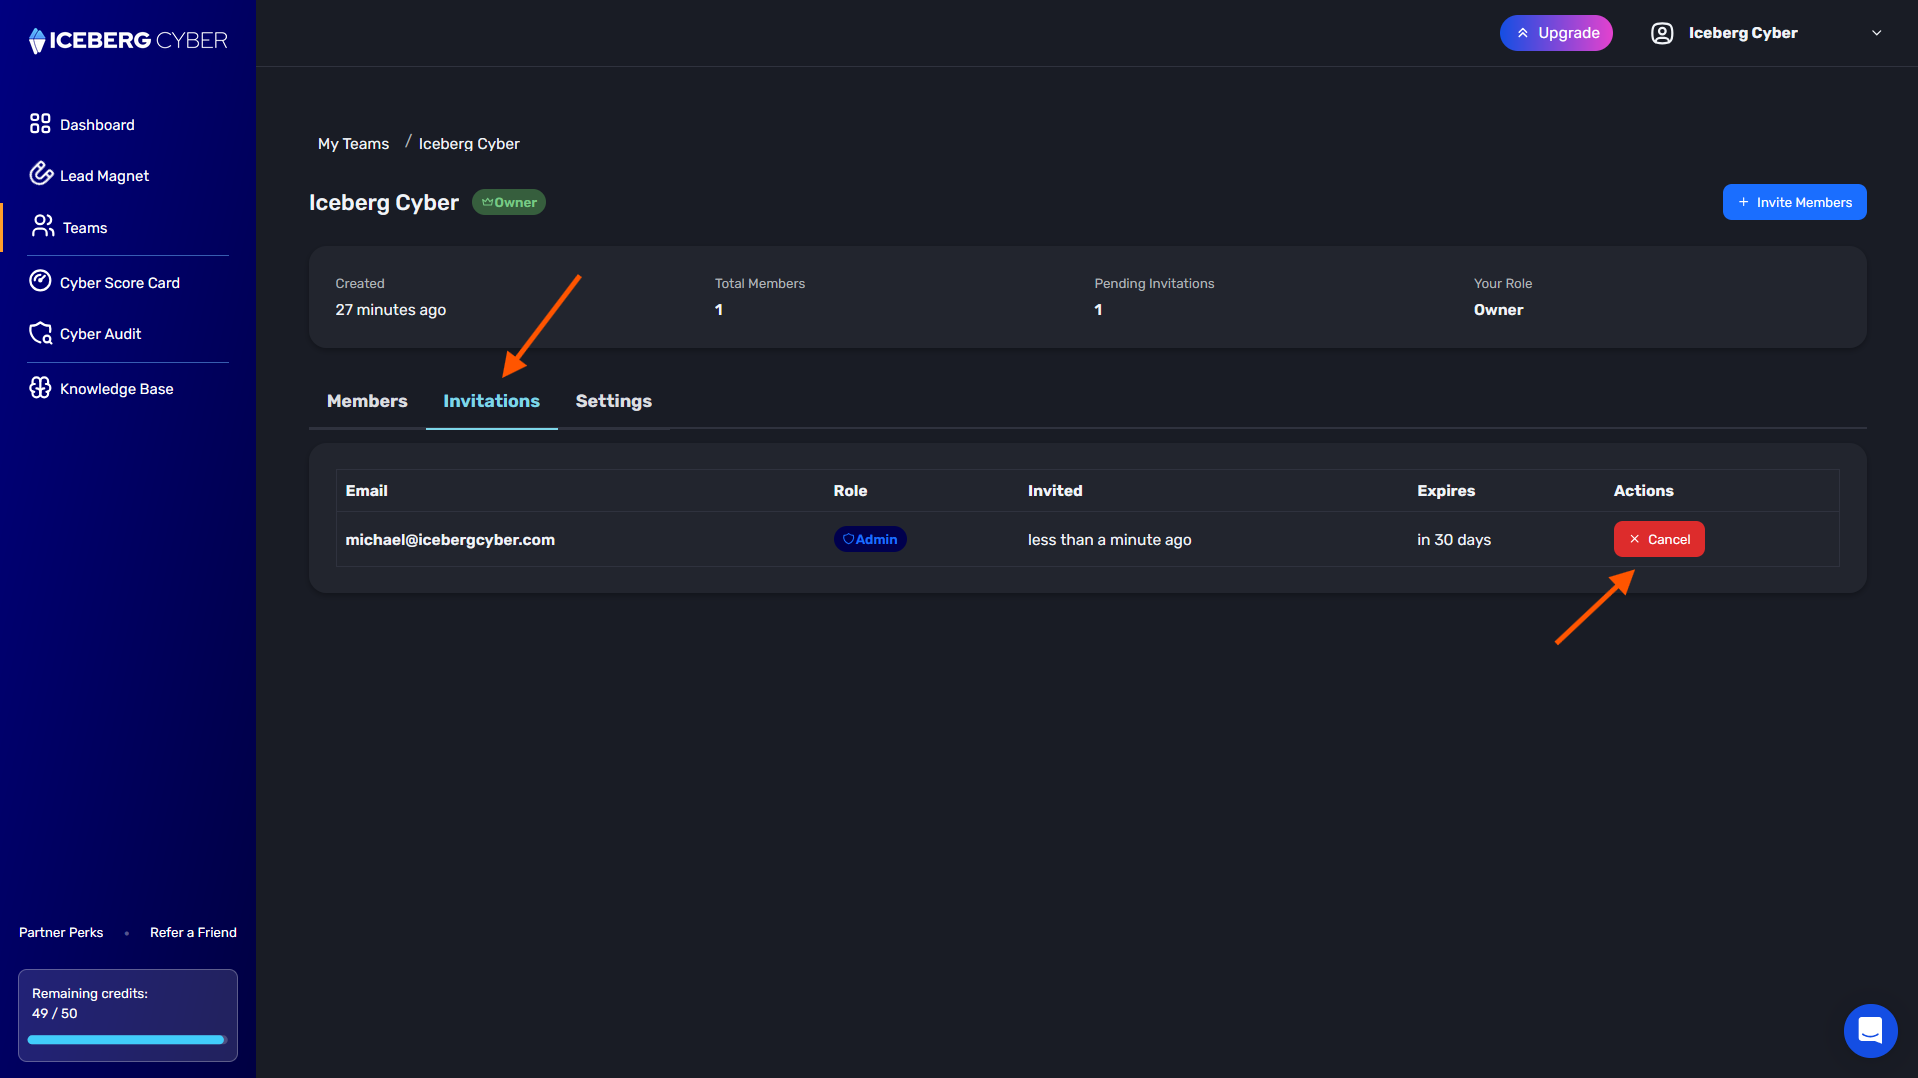
1. Click the Invitations tab
2. View all pending invitations with email, role, and expiration date
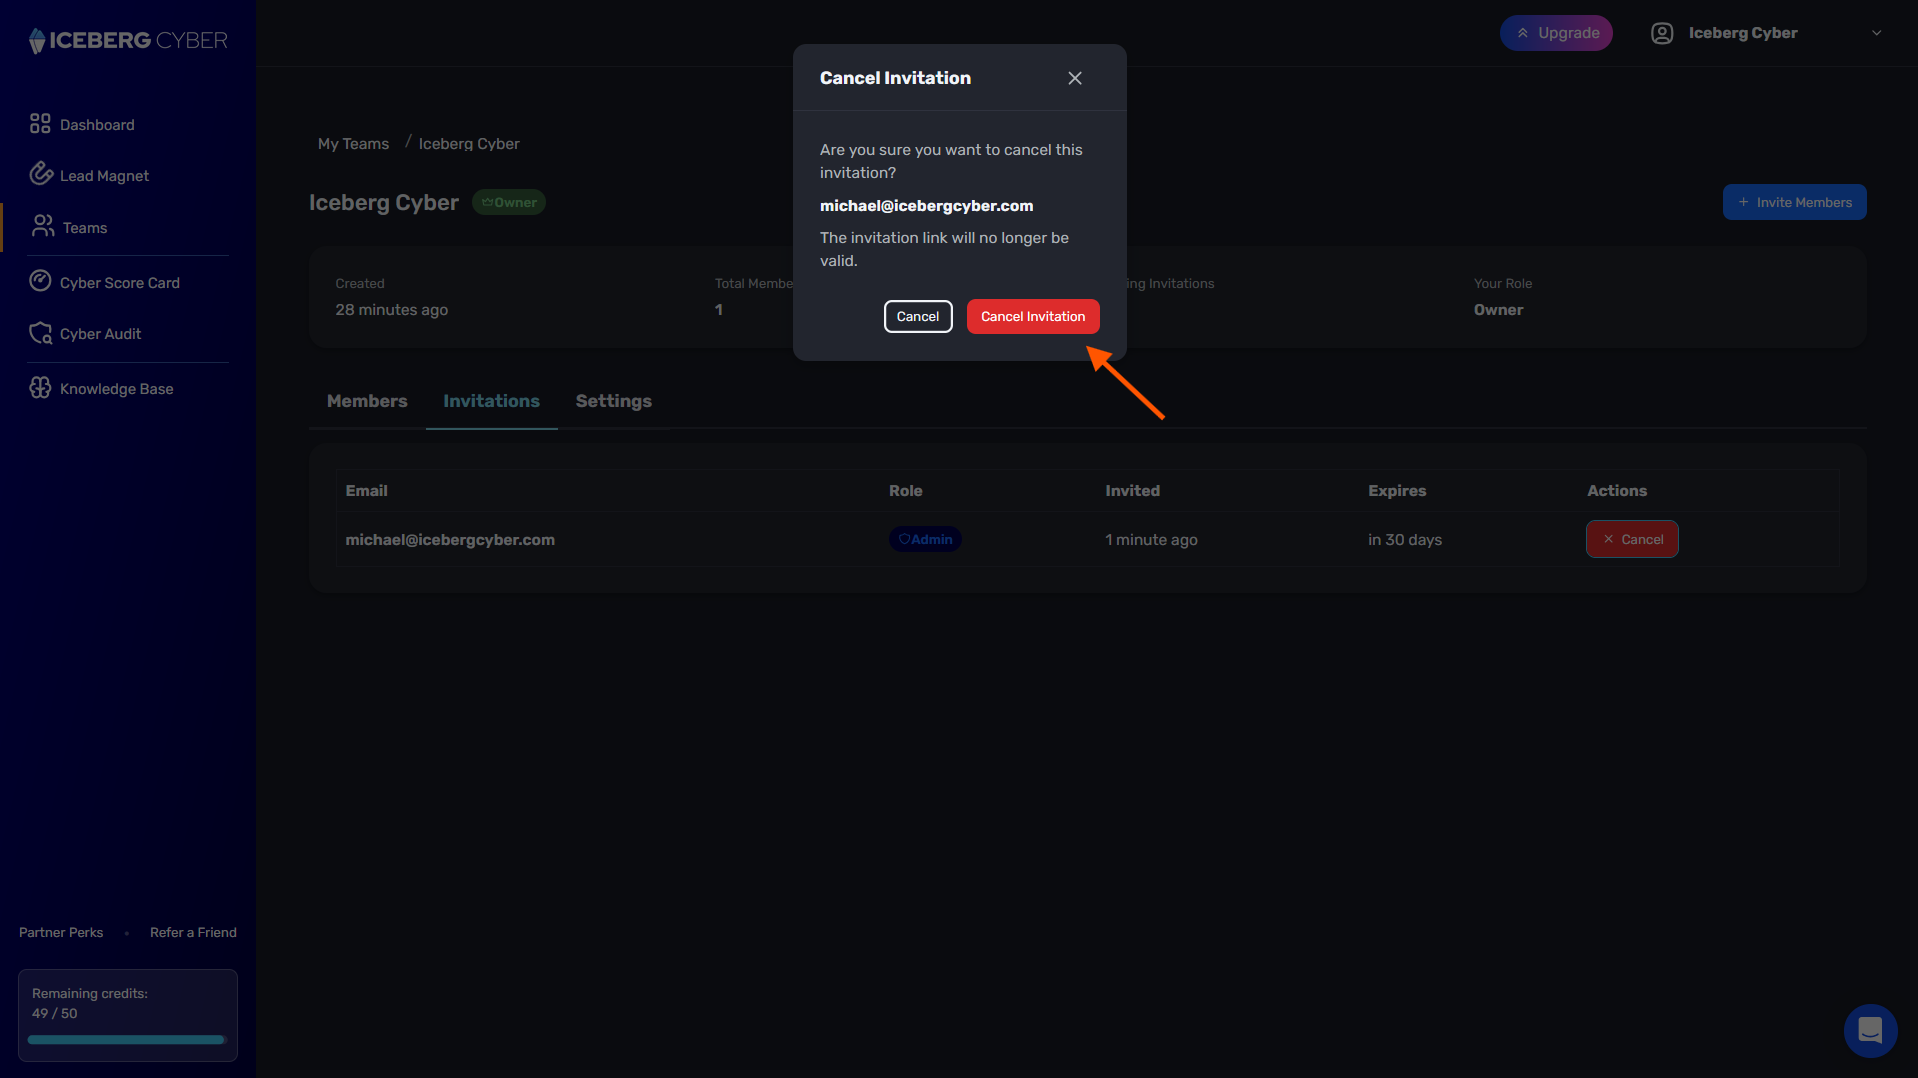
1. Locate the invitation to cancel
2. Click the Cancel button
3. Confirm the cancellation
Note: The invitation becomes invalid immediately and they will not be prompted to join when they log in.
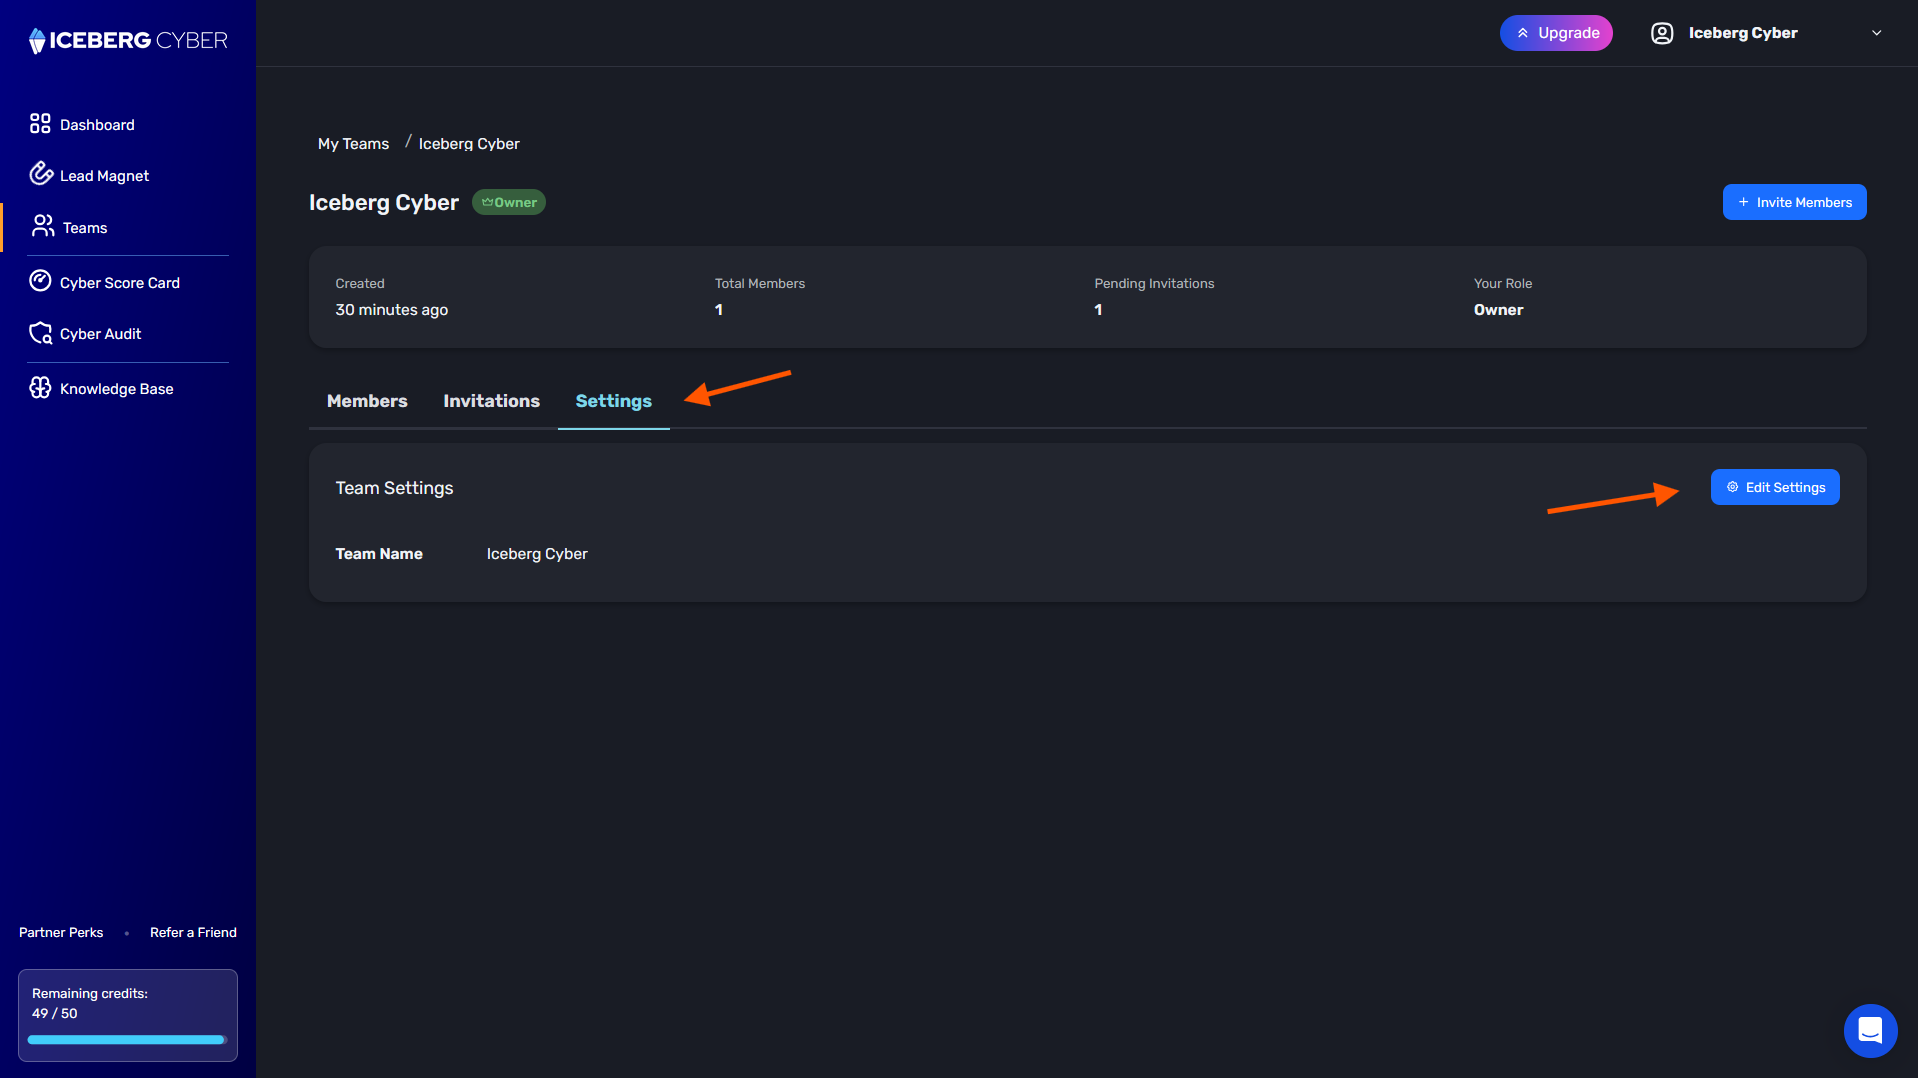
1. Click the Settings tab
2. Click Edit Settings
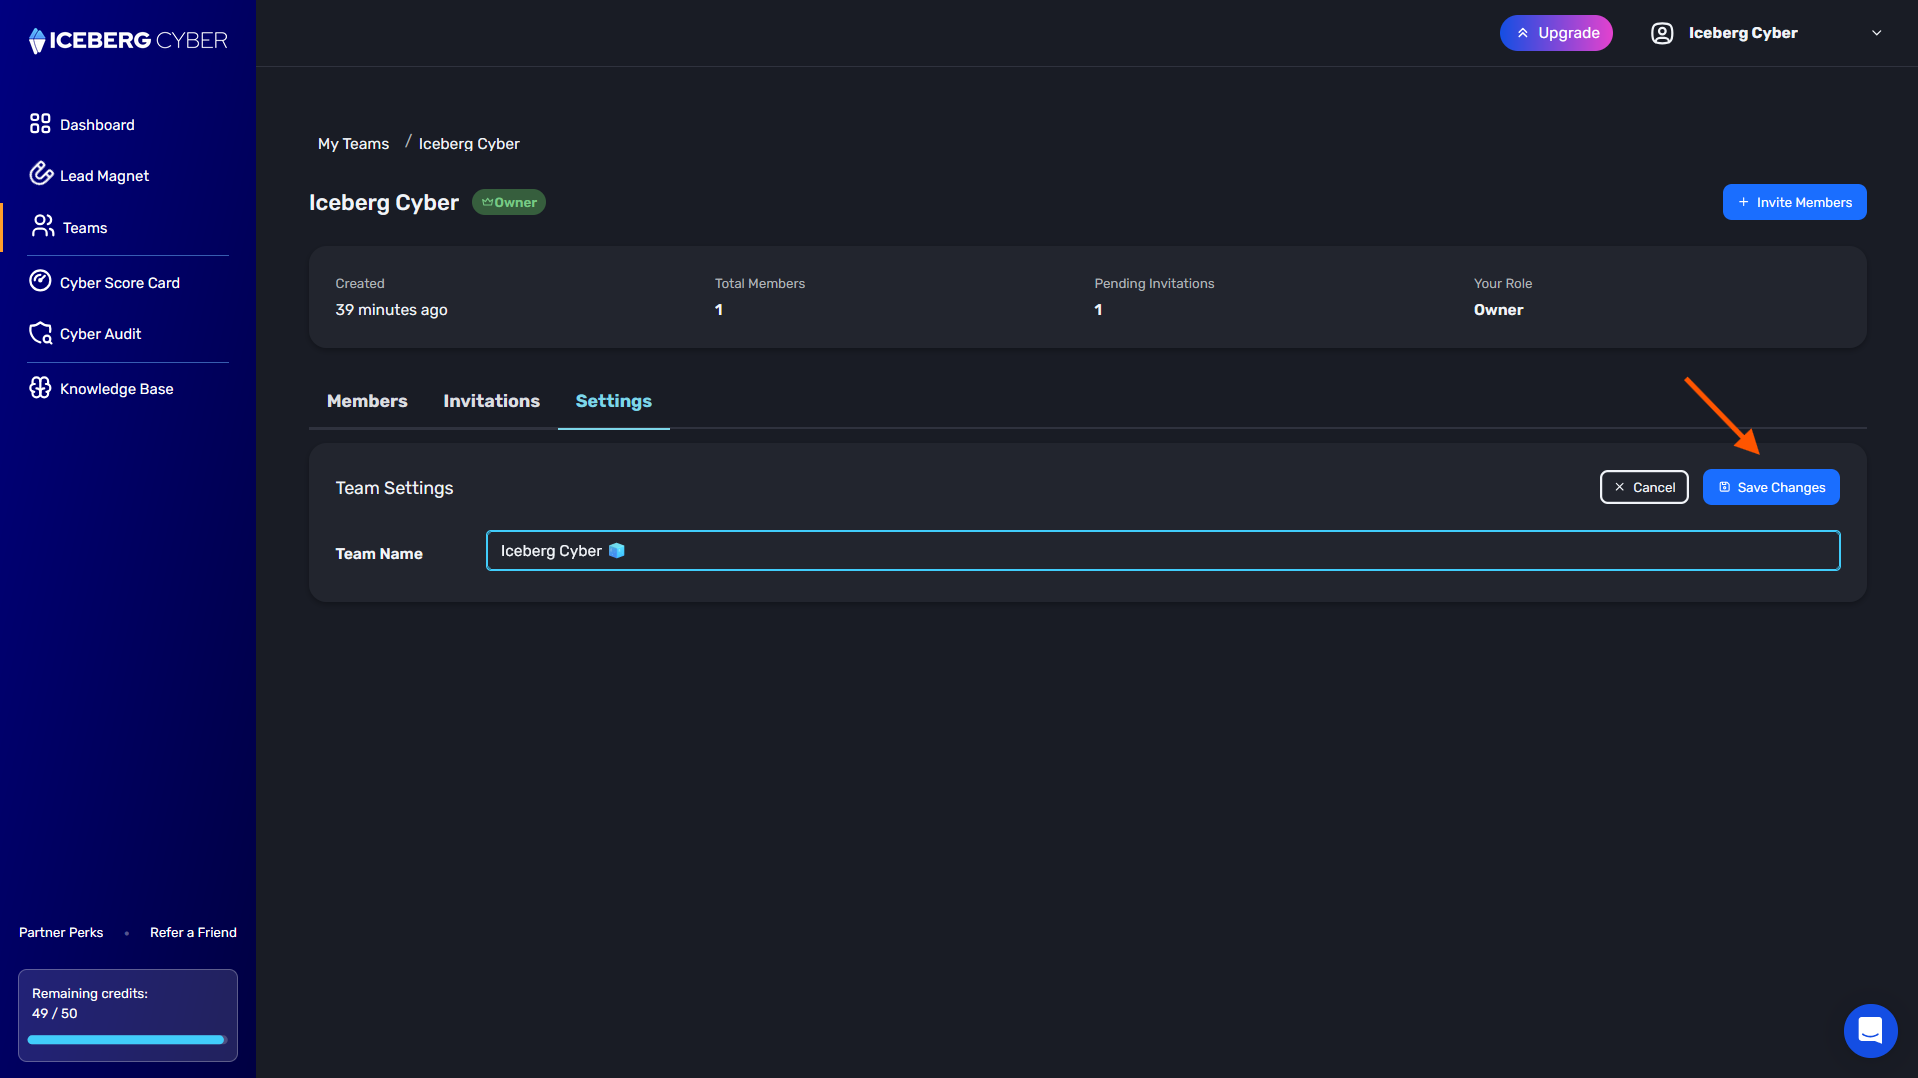
3. Update the Team Name
4. Click Save Changes
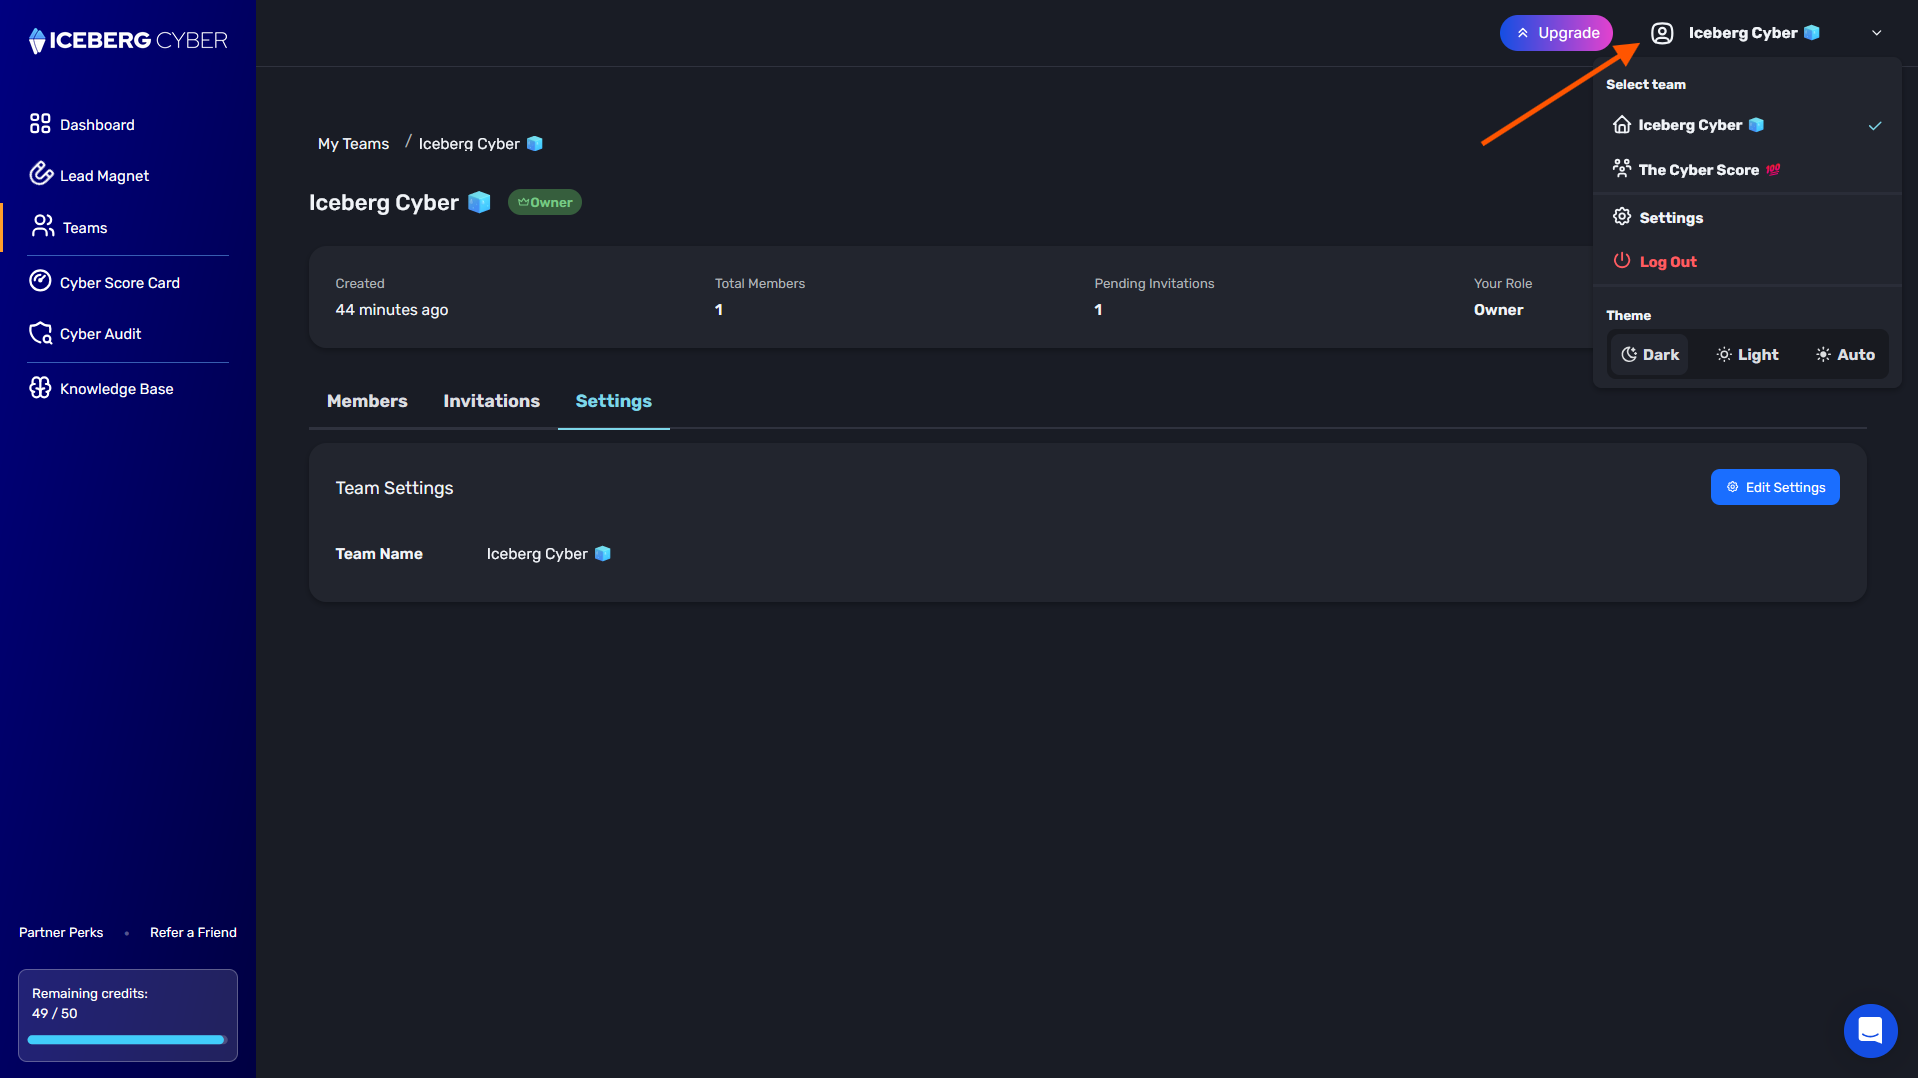
1. Click on your team name in the navigation menu
2. From the drop-down, select the team you want to switch to
3. Your Dashboard will update to show that team's information
Problem: "You already own a team" message appears when trying to create a team.
Solution: You can only create one team as an owner. Join other teams by accepting invitations instead.
Problem: Cannot see the Invitations or Settings tab.
Solution: These tabs are only visible to Owners and Admins. Members have view-only access.
Problem: Cannot remove a specific team member.
Solution: You cannot remove the team owner or yourself. Only Owners and Admins can remove other members.
Problem: Invitation hasn't been received.
Solution: Check the email address is correct in the Invitations tab. Invitations expire after a set period. Resend the invitation (confirm the email is correct).
